Set up a climbing route with expansion bolt
Would you like to set up a climbing route with expansion bolt? Then bolting.eu is the right place for you. Because we are the experts when it comes tobolting a climbing route. We will provide you with comprehensive information below. So that you can establish a climbing route with bolts yourself.
Firstly, the advantages of this fastening system. Secondly, of course, the disadvantages. Thirdly, we systematically list the work steps. Fourthly, we present the materials required.
Would you like to use glue in bolt? Then read our article“Setting up a climbing route with glue in bolt “.
Setting up a climbing route with expansion bolt – the advantages
There are several reasons in favor of expansion anchors. To put it simply, installation is very simple. It is also very quick. And on the other hand, the costs are low. In addition, the fixed point can also be loaded immediately.
Time factor
Putting in the expansion bolt is quick. It often only takes a few minutes and all the work steps are done.
Therefore, establishing a climbing route with bolts is a clear decision.
Simplicity
The processing of bolts is relatively simple. On the one hand, the entire process involves very few steps. And secondly, the way the expansion hooks work is very simple. So all in all, you can do very little wrong.
You can find the individual steps in the article “Setexpansion bolt “.
Set up climbing route with expansion bolt -costs
The combination of expansion bolt and bolt hanger is relatively inexpensive. The price is approx:
- zinc plated steel: € 2,-
- A2 steel: € 3,-
- A4 steel € 4,-
- PLX / Duplex steel: € 6,-
- Exception HCR steel: € 30,-
In addition, the (thin) SDS drill bits required are relatively inexpensive.
The components for processing and the drill bits themselves are considerably more expensive! glue in bolt themselves are considerably more expensive!
Immediately loadable
Bolts are so handy because you can load them straight away. This is extremely helpful in some situations.
Firstly, when “bolting in the lead”. Secondly, when bolting in overhangs. Thirdly, when installing lower off climbing anchors. And fourthly, when setting up abseil routes.
Setting up a climbing route with expansion bolt – the disadvantages
Bolts do not only have advantages. You should therefore be aware of the following six facts.
- Rock subsoil
- Explosive effect
- Torque
- Influences on the components
- suitable bolt hanger
- galvanic corrosion
We want to explain the individual points in detail again.
Rock subsoil
Expansion anchors have enormous holding forces and breaking loads (approx. 20 kN). These are far higher than the forces from climbers’ falls (approx. 4-6 kN). So before a bolt itself fails, the rock base is more likely to break. It is therefore extremely important to check the quality of the rock. This is done with the so-called “hammer test”. If you want to open up a route with bolts, you need to know what they are.
To do this, “tap” the rock at the desired point with a rock hammer. High and “firm” sounds are good. Deep and “dull” tones indicate cavities. In such places, expansion bolt cannot be set.
Only solid and continuously compact rock is suitable for the installation of expansion bolt.
Gerhard Schaar – Founder bolting.eu
Soft or porous rocks are not suitable for expansion bolt! These include sandstone, marl and usually also (very porous) conglomerate. Tuff can also be very porous.
Explosive effect expansion bolt
For a bolt to hold, it must be donned accordingly. In the process, the so-called “cone” pushes into the expansion links. This means that the axial force of “donning” is converted into radial force. In short.
The expansion links press laterally against the rock. This ensures that the bolt is held firmly in place.
On the other hand, this also has a considerable “blasting effect”. If you want to set up a climbing route with expansion bolt, you need to be aware of this!
This results in the principle of the tear-out cone for expansion bolt. It states the following. If a piece of rock tears out, the radius of the tear-out cone on the surface is 1.5 x the setting depth.
In other words: If a expansion bolt is 10 cm deep, there must not be a crack or another tear-out cone 15 cm around it.
Consequently, expansion bolt must always be 3 x the drilling depth apart at lower off climbing anchors or abseiling points. As a rule, this is a minimum distance of 30 cm!
Set up climbing route with expansion bolt torque
The torque for expansion bolt is a small but very important detail.
This is because it describes the force with which a expansion bolt should be donned. Too little and the bolt does not hold properly. Too much and the hook gets too much material pretension.
To put it better: tighten properly, but not too tight!
The rule of thumb is: If you hear the “crack-crack” (“breaking open the expansion links”) at donning, leave it alone!
You can find the exact torque on the packaging. It can also be found in the manufacturer’s data sheets.
Influences on the components
A glue in bolt sits encased in injection mortar “firmly” in the drilling hole. In other words:
- 1 Component
- no movement
- nothing can become “loose”
- No water in the drilling hole
- Forces are distributed relatively evenly in the event of a fall
However, this is completely different with the combination of expansion anchor and bracket.
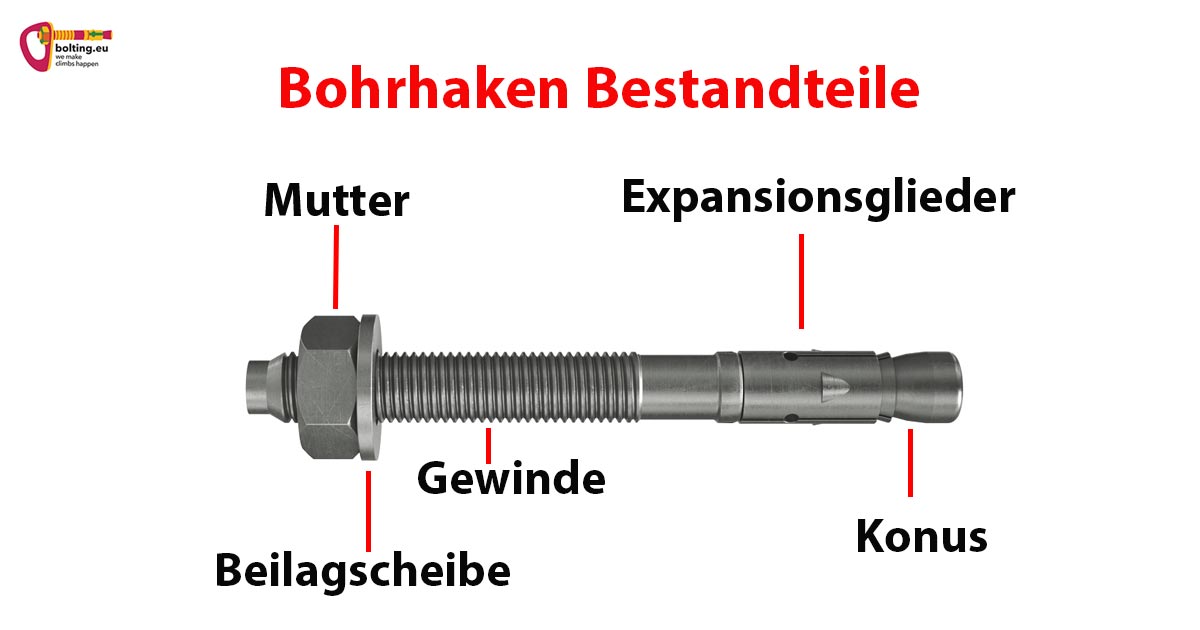
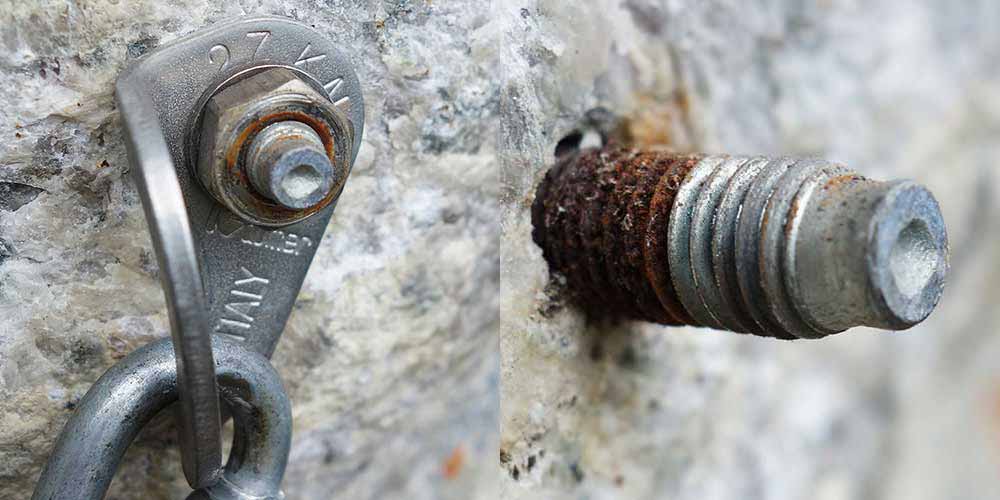
- 5 (!) components: expansion bolt- shank, expansion links, washer, nut, bolt hanger)
- There are tiny movements with every fall
- Mother can become loose
- Water penetrates into the drilling hole
- Strong forces on the lug and 1st third of the bolt
It is therefore hardly surprising that the following negative effects occur:
- Lower overall service life
- Loose nuts and “wobbly” lugs
- bent tabs
- Missing tabs
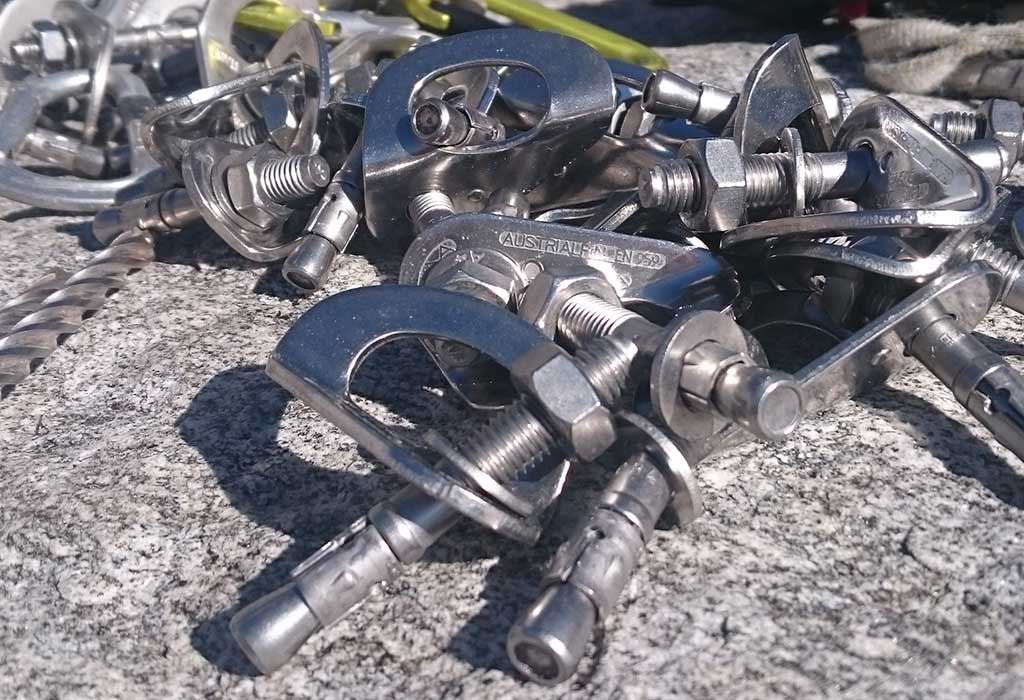
3mm or 4mm bolt hanger
Would you like to set up a climbing route with expansion bolt? Then you should definitely know about the different bolt hanger. As a rule, lugs made of 3mm and 4mm thick sheet steel are available.
Our recommendations are:
3mm tabs
On the one hand, ideal for routes with normal frequency and where there is little falling. On the other hand, perfect for alpine access due to its low weight.
4mm tabs
On the one hand, ideal for routes with a very high frequency and where there is a lot of falling. On the other hand, for all applications where strong forces are applied, e.g. slacklines, flying fox, ….
-
Product on sale
 10mm stainless steel bolt hanger – 3mm / AISI 316L steelOriginal price was: € 2,80.€ 2,50Current price is: € 2,50.
incl. 20% VAT
-
 FIXE 10mm PLX Bohrhakenlasche€ 2,99
incl. 20% VAT
-
Product on sale
 10mm Austrialpin bolt hanger AISI 316LOriginal price was: € 3,30.€ 3,00Current price is: € 3,00.
incl. 20% VAT
Galvanic corrosion
Unfortunately, many developers are not aware of this chemical principle. Do you want to establish a climbing route with bolts soon? Then please take this advice to heart. Avoid mixing galvanized steel and stainless steel components at all costs!
For example, zinc plated expansion bolt and stainless steel lug.
Because this inevitably leads to corrosion!
You can find all the details on this topic in our article on galvanic corrosion at expansion bolt.
The expansion bolt standard
The EN 959 – UIAA 123 standard defines the specifications for fixed points in alpine sports. It is particularly relevant for climbing crag owners. I.e. bodies that operate “official” climbing areas.
The most important points (simplified) are
- All fixed points made of corrosion-resistant stainless steel
- 15kN axial and 20kN radial breaking load for substrate / component
- Drill hole depth: a fixed point must hold regardless of this
- Anchoring depth: 5 x the drilling diameter for bolts
- Eyelet shape and thickness for the lugs: min. 3 mm and 0.2 mm edge radii, as well as accommodation of 2 fasteners
You can find all the details on this topic in our article“EN 959 – UIAA 123 expansion bolt standard“.
Setting up a climbing route with expansion bolt – the diameters
Surprisingly, a frequently asked question from our customers is: Which expansion hook diameter should I buy?
We therefore want to answer this question below.
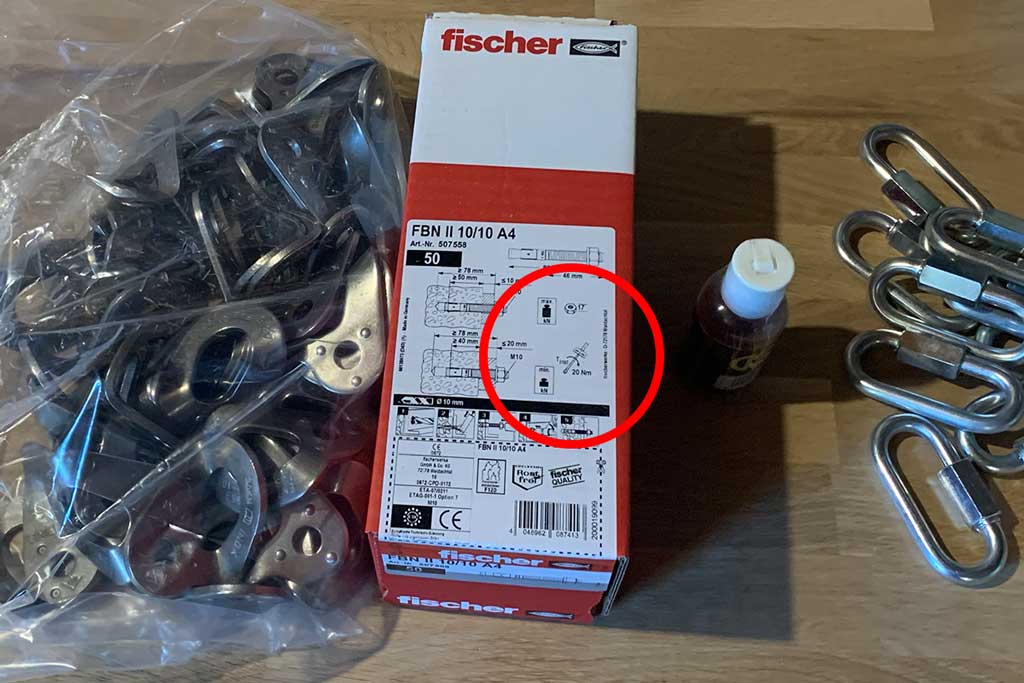
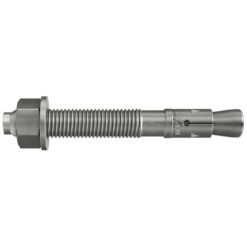
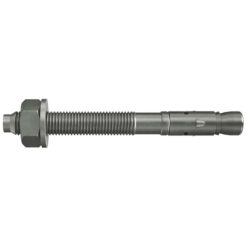
Standard 10mm and A4 steel
The current standard for climbing routes is clearly 10mm expansion bolts made of A4 steel. If you want to establish a climbing route with bolts, this is the best choice! On the one hand, they have the necessary breaking load values. On the other hand, they also have the right corrosion class for a long service life
You want to establish a climbing route with bolts “privately”? Do you have super solid rock like granite? Then we recommend slightly cheaper “short” bolts around 70mm. Climbing garden owners should fall back on the standard length of around 90mm.
In solid rock, the inexpensive Fischer FBN II in A4 steel performs perfectly. In somewhat more porous rock, the Fischer FAZ II. If you want to choose an even higher corrosion class, you need the bolts made of Fixe PLX / Duplex steel.
So-called HCR expansion bolt have the highest steel quality.
You can find all the details about the different grades in our article“Steel grades at expansion bolt and glue in bolt“.
-
 Fischer Schwerlastanker FBN II A4 Stahl€ 1,69 – € 3,49
incl. VAT
zzgl. Versandkosten
-
 Fischer FAZ II Bolzenanker A4 Stahl€ 2,39 – € 3,99
incl. VAT
zzgl. Versandkosten
Set up climbing route with expansion bolt – 12mm?
12mm expansion bolts in climbing routes make no sense from our professional point of view. This is because, as previously mentioned. Even 10mm bolts achieve the necessary holding forces for climbing.
From a technical point of view, a static fall into a expansion bolt with a webbing sling is the worst-case scenario. In other words, fall factor 2, which is why you should consider using 12 mm bolts, especially on multi-pitch routes.
8mm expansion bolt
You want to set up a climbing route with expansion bolt and use 8mm bolts? This is no longer common!
However, some developers use this diameter in alpine or high alpine routes. The reasons are easily explained. Firstly, the low weight of the bolt and lanyard. Secondly, the low battery energy for the drilling hole. And thirdly, the cost.
Incidentally, we only recommend zinc-plated expansion bolt or lugs for temporary fixed points.
Establishing a climbing route with expansion bolt – the steps
In the following, we explain all the steps in their chronological order. We have simplified this somewhat. This makes the article clearer. If you would like more detailed information, read our lead article“Bolting a climbing route“.
Set up a climbing route with expansion bolt
- lower off set up
Always try to set up lower off first.
– switch the lower off-climbing anchor in series: The expansion bolt must be one above the other. The distance must also be at least 3x the drilling depth of the expansion bolt (tear-out cone!).
– Chain without tension: The chain of the lower off should sag slightly.
– Deflection carabiner: This should protrude at a right angle at the lower anchor point. If necessary, use a rapid link to achieve this. The perfect position for the carabiner is hanging freely in the air.
– Abrasion of the climbing rope: Avoid abrasion of the rope at all costs when climbing lower off. Choose a smart position to avoid rope abrasion on an edge or scale near the belay!
After installing the lower off, you can clean and boulder out the route. - Cleaning and bouldering
Take your time if you want to establish a climbing route with bolts.
On the one hand, this includes proper cleaning. You can find the right wire brushes and hand brushes here.
And on the other hand, bouldering out the route. The ideal route becomes clear. It simply follows the path of least resistance. In other words, the easiest line.
- Set clip positions
Finds the best clipping positions when bouldering out. I.e. stable positions in which the quickdraws should be clipped. Pay attention to safe and regular hook spacing.
Properly setting up a climbing route with expansion bolt means:
– Adjust the hook density to the level of difficulty: Easy routes usually have a higher hook density. Difficult routes, on the other hand, need fewer fixed points.
– High hook density at the start: There are deliberately more hooks in the first 5-7 meters. This is to avoid ground falls.
– Landings and ledges: The same rule applies here as for the entrances. Ensure increased hook density to prevent “hitting” in the event of a fall.
Due to the clip positions, the exact position of the securing points is automatically narrowed down.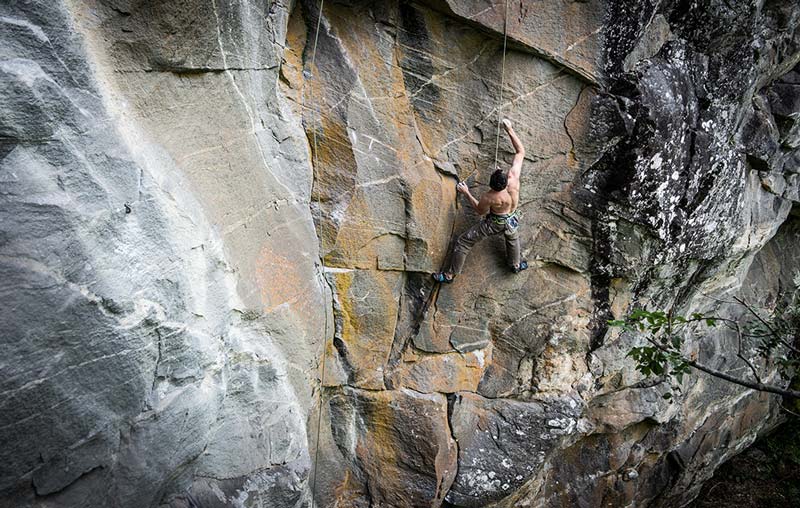
- Marking the hook positions
If you want to establish a climbing route with bolts, you have to work very cleanly. That’s why we recommend the “5 point check”.
– 1. elbow check: Use your elbow to check whether even a small person can hook the hook.
– 2nd quickdraw check: Check whether the carabiner on the side of the rock or on the side of the rope has a cross-loading. To do this, sloper both a short and a long quickdraw on the rock to clarify this.
– 3. grip and step check: Am I blocking my grip or step with the clipped quickdraw? You should avoid this at all costs!
– 4. rope course check: The hook should be in a straight line with the other hooks. An even curve in the course of the rope is also okay. When it comes to “Perfectly setting up a route with bolts”, the following applies: the course of the rope simply has to fit!
– 5. hammer test: Use the rock hammer to tap the place where the hook should go. There should be no “hollow” sound. It may be necessary to attach an extension from the nearest solid rock surface. This way you can still clip in the desired place!
You can mark the fixed position of the expansion bolt with a chalk dot.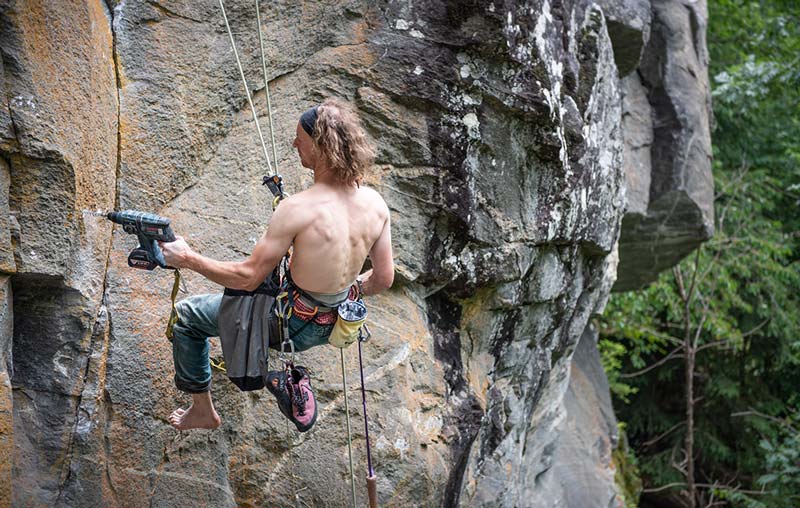
- Set up actual climbing routes with expansion bolt – Set hooks
Mark the drilling depth on the drill bit with climbing tape first. The diameter must be the same as that of the expansion hook.
It must be possible to sink the bolt completely! Consequently, the drilling depth must be slightly longer than the hook used.
Drill the holes marked accordingly. Clean the drilling hole with a blow out pumb or a hole brush. Then hammer in the drill hook and tighten it.
Note the following details:
– correct torque
– thread protrusion min. 3mm and max. 6mm
– tab resting flat on the rock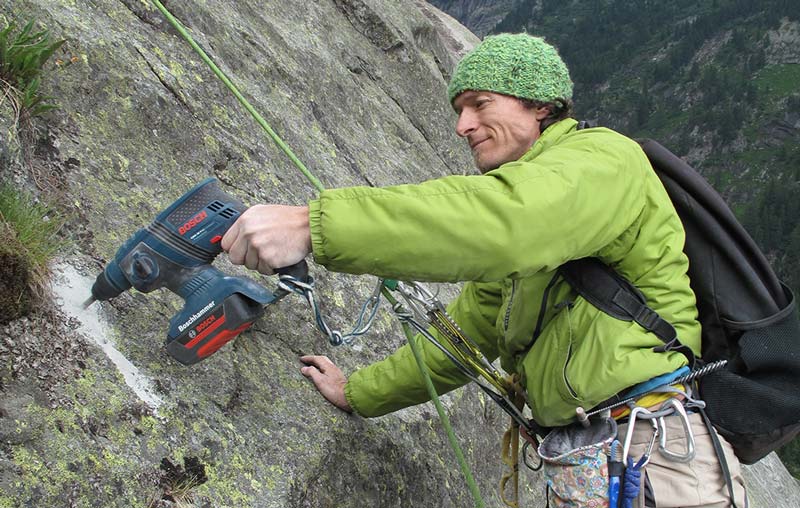
- Final theses
Once the route is finished for the first time, the following usually remains to be done:
– clean again and, if necessary, prepare the base of the wall
– test climb to see if everything fits
– tighten loose bolt hanger again with feeling
– if hook positions are not successful: if necessary, attach screw links with extensions to the hooks or drill around hooks
– make an assessment suggestion
– give the route a name
– mark it locally if necessary
Legal framework
The framework conditions are quite different in the countries of the Alpine region. To list them here would go far beyond the scope of this article.
For Austria, the climbing area handbook published by the province of Tyrol provides a very good overview of the entire topic.
Bolting a climbing route with expansion bolt – practical tips
In the following, we at bolting.eu offer you some practical tips. They should help you to avoid typical mistakes and make your life as a developer easier 🙂
Haulbag
Do you want to bolt multi-pitch routes? Then we advise you to use a small haulbag.
On the one hand, you can use it to transport all drilling materials and carry them on the approach. And you can also take it into the wall.
Simply hang it in the belay loop with screwgate carabiner. It dangles comfortably between your legs when rappelling!
-
Product on sale
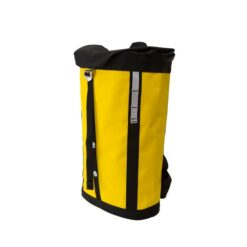 Metolius Mescalito HaulbagOriginal price was: € 170,00.€ 153,00Current price is: € 153,00.
incl. 20% VAT
zzgl. Versandkosten
-
Product on sale
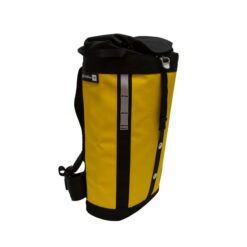 Metolius Express HaulpackOriginal price was: € 200,00.€ 180,00Current price is: € 180,00.
incl. 20% VAT
zzgl. Versandkosten
-
Product on sale
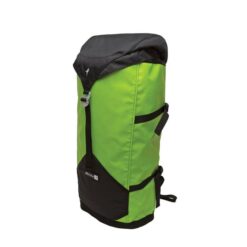 Metolius Freerider HaulpackOriginal price was: € 230,00.€ 210,00Current price is: € 210,00.
incl. VAT
zzgl. Versandkosten
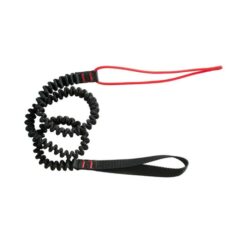
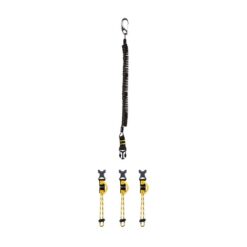
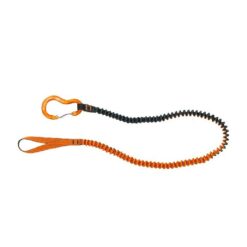
Connect tools!
Murphy’s law. Anything that can fall down will fall down sooner or later!
You should therefore tie up all the important tools. Cordalettes or various lines and leashes are suitable.
-
 Stubai ice axe Loop Leash€ 15,90
incl. 20% VAT
zzgl. Versandkosten
-
 Beal Air Leash tool holder€ 24,90
incl. 20% VAT
zzgl. Versandkosten
-
Product on sale
 Materialschlinge Climbing Technology WhippyOriginal price was: € 21,50.€ 19,50Current price is: € 19,50.
incl. 20% VAT
zzgl. Versandkosten
Reserve material
Always take enough spare material with you in your bolting haulbag!
Drills, batteries and a second wrench. So you don’t have to go back to the ground if a drill breaks, a battery fails or material falls down!
-
Product on sale
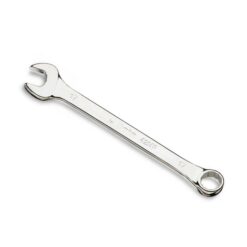 17 mm combination wrench for M10Original price was: € 13,90.€ 10,00Current price is: € 10,00.
incl. 20% VAT
zzgl. Versandkosten
-
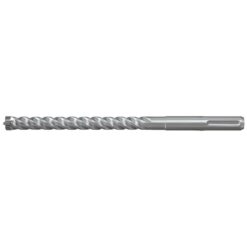 SDS Plus Bohrer Pointer€ 5,90 – € 13,90
incl. VAT
zzgl. Versandkosten
-
Bohrer SDS Quattric II€ 11,90 – € 26,90
incl. VAT
zzgl. Versandkosten
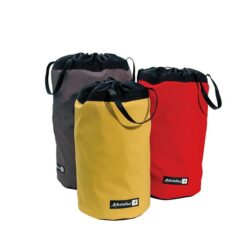
Material bag
We ourselves use the practical material bags or tool bags for single-rope routes or bolting in the climbing area.
This is where the pitons, lugs, glue or squeeze guns and spare materials go.
-
 Metolius Big Wall Stuff Sacks Materialsäcke€ 35,00 – € 39,00
incl. VAT
-
Product on sale
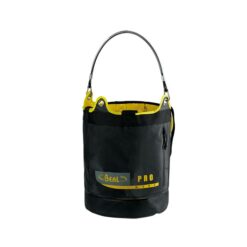 Beal Genius Bucket WerkzeugeimerOriginal price was: € 129,90.€ 119,90Current price is: € 119,90.
incl. 20% VAT
zzgl. Versandkosten
-
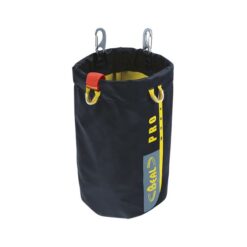 Beal Tool Bucket Long€ 24,90
incl. 20% VAT
zzgl. Versandkosten
Bolting checklist
Below we offer you a bolting checklist as a pdf download. It lists everything you should have in the wall. So you can’t forget anything!