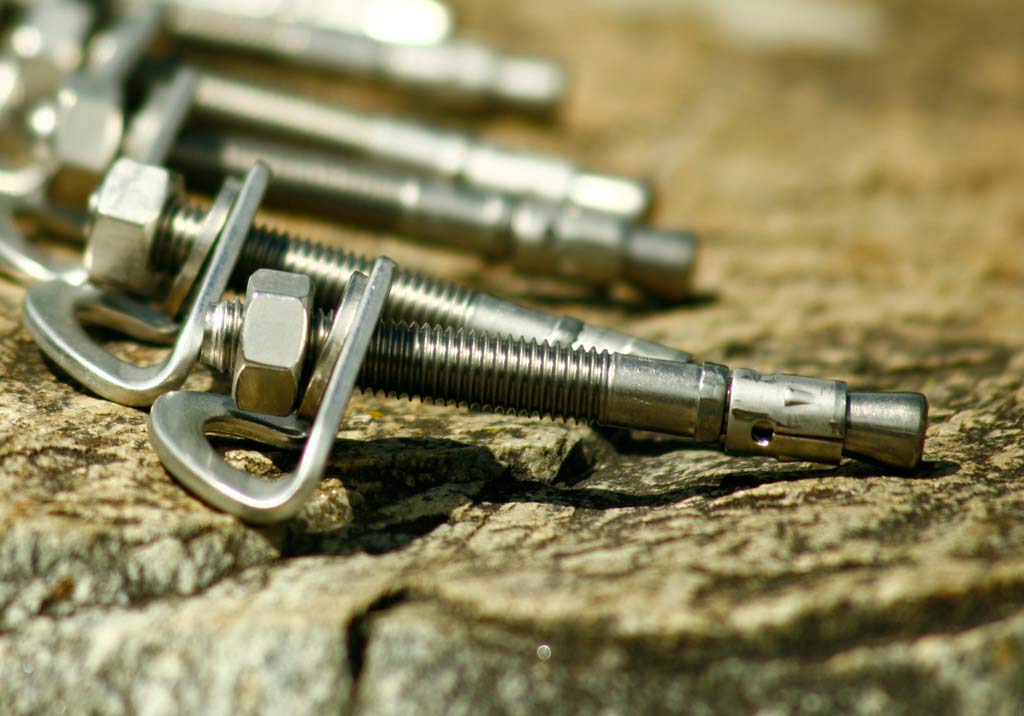
expansion bolt set
expansion bolt set
bolting.eu is THE expert for bolting. That’s why you’ll find instructions on how to set expansion bolt below. They are often referred to as “bolt anchors”. This is why they are often referred to as “bolt anchors”.
Other names for this product are also bolts, expansion anchors or heavy-duty anchors.
Installation is not rocket science in itself. As long as you follow a few important basic rules. In any case, setting a bolt is much less error-prone than setting a glue in bolt.
If you like this article, you should also read the following instructions and important articles:
- to bolt a climbing route
- Set up a climbing route with expansion bolt
- Set up a climbing route with glue in bolt
- and many more.
Choose the right steel quality
The recommendation from bolting.eu for setting expansion bolt or sustainable development is clear. All bolting materials in the Alps should be made of A4 steel / AISI 316 steel. This applies to all elements of a climbing route. I.e. the expansion bolt, bolt hanger and lower off / climbing anchors as well as quick links if necessary.
On the one hand, this steel quality complies with the UIAA recommendation and EN 959 – UIAA123 drill hook standard. And secondly, the longevity of this grade results in the desired sustainability.
When setting bolts, you should therefore be familiar with the steel qualities. You can read in detail why in our technical article“Steel qualities for expansion bolt and glue in bolt“.
When bolting near the sea, other material recommendations apply than in the inner Alpine region. The following must be used here:
- Duplex / PLX steel
- HCR steel
- Titanium drilling materials
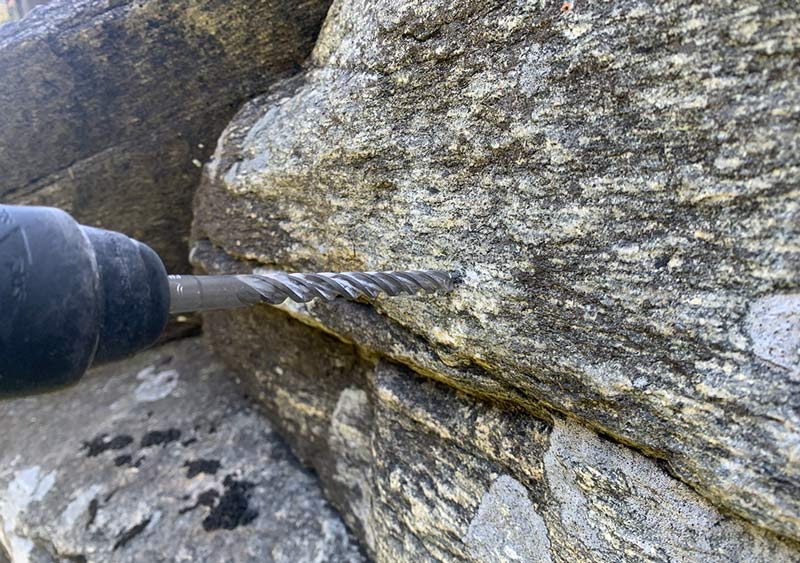
expansion bolt set – watch out for drill bits!
Admit it! You probably didn’t think about SDS drill bits when you were thinking about setting bolt anchors. Nevertheless, this tool is crucial.
The following things are important.
Firstly, you should only use drill bits with a PGM test mark. This is because they guarantee the so-called cutting edge corner dimension. Or to put it better. These drill bits are guaranteed to produce a round hole. This means that the bolts can be hammered in without damaging the expansion rings.
Secondly, the drill bits should be as short as possible. This is because with long drill bits, the cordless hammer drill starts to rotate and the drilling hole becomes slightly conical. As a result, a loaded bolt can wobble slightly. This can cause the lugs to become loose.
Thirdly, we recommend high-quality products such as the Fischer Quattric drill bit. This is because these drill bits have two cutting edges and therefore produce uniform holes for longer. You notice this when hammering in the bolts. The harder they go into the drilling hole, the more the drill bit is worn and should be replaced.
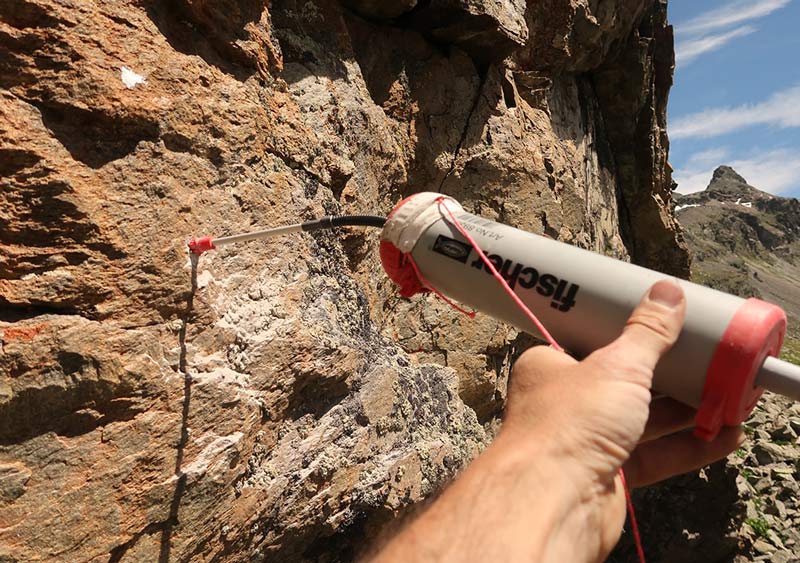
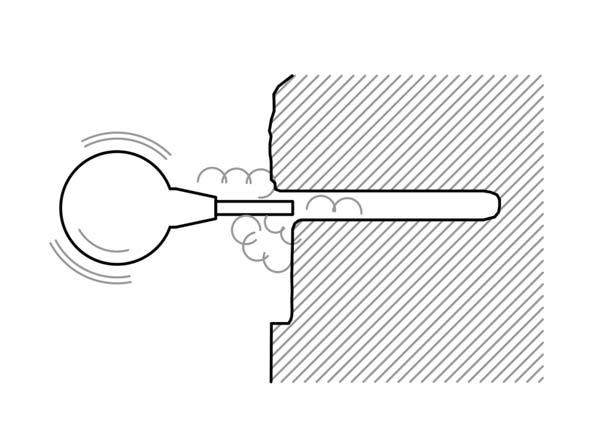
drilling hole Always clean
You come across this false statement again and again. “You don’t need to clean the hole when setting expansion bolt “.
This is simply not the case. And for very logical reasons. We explain these in more detail below. That’s why you should either always have a perforated brush or, if necessary, a blow out pumb with you. This is a good way to get most of the drilling dust out.
“Slip”
The more drill dust there is in the drilling hole, the greater the “slip” can be. This is the distance over which the bolt shaft slides out of the hole until the expansion links have slid over the cone.
expansion bolt set on plates
The flatter a rock is, the more drilling dust remains at the bottom of the drilling hole. This means that there can be up to 1 cm of drilling dust on slabs or horizontal ledges.
As a result, you may experience unpleasant surprises when setting the bolt anchor. Or to put it better. Without a marking on the drill, bolts can suddenly protrude much further than expected.
This drilling dust can only be removed if you then work with a drilling hole blow out pumb .
expansion bolt set – procedure
Time needed: 5 minutes
Set correctly expansion bolt
- Check drill substrate
Tap the rock with the rock hammer and check for hollow spots. They are easily recognizable by a “dull” sound.
- drilling hole drill
Always drill at 90° to the rock surface.
Only use an SDS drill bit with a PGM test mark. This guarantees a round hole. On the other hand, use a drill bit that is as short as possible to prevent “knocked out” holes. I.e. slightly conical holes.
The drilling hole depth should be greater than the expansion bolt length. This allows you to sink the bolt completely later if necessary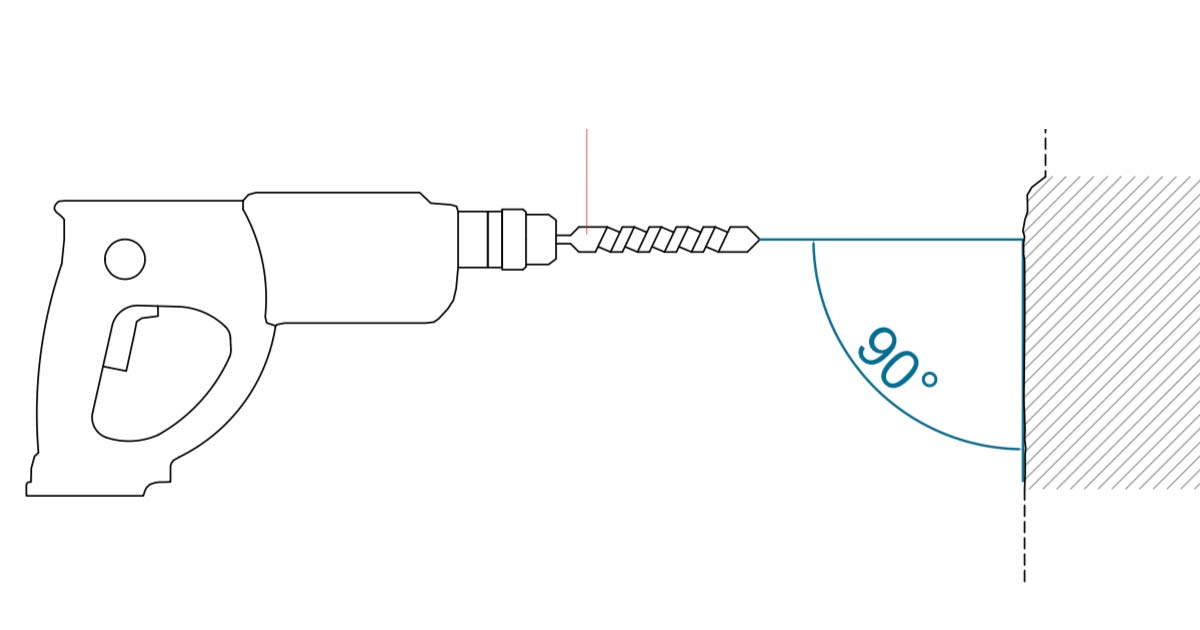
- drilling hole clean
Use a suitable perforated brush for cleaning and, if necessary, a blow out pumb.
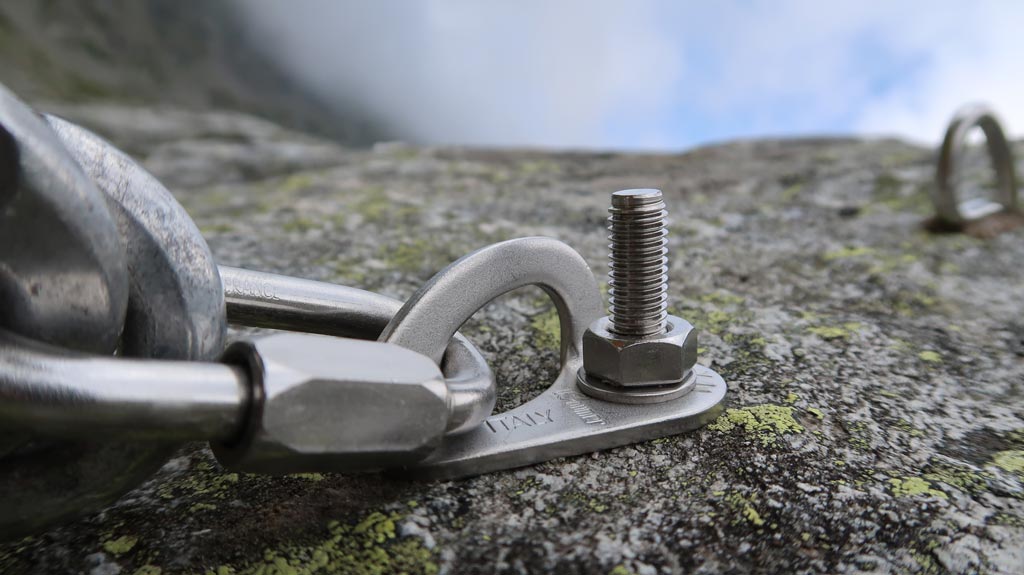
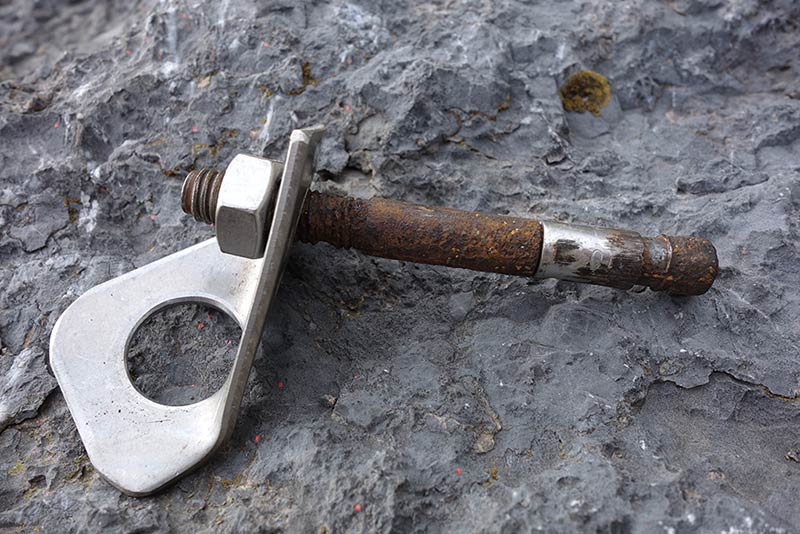
- expansion bolt strike
Mount the bolt hanger on the expansion bolt before hammering it in. The nut should be at the very back of the thread without protruding.
If the bolt is difficult to drive, the drill bit is probably already too worn. In this case, change the drill bit.
- Donning the nut
After hammering in, you must tighten the nut on the expansion bolt. For 10mm bolts you need a 17 mm wrench. For an 8mm hook a 13mm wrench and for a 12mm bolt a 19mm wrench.
Please note. Each expansion bolt has a very specific torque. I.e. a certain force with which it should be donned. For this, you must know the specifications on the packaging or in the technical data sheet.
Set video expansion bolt
In the following, we show you a video on the subject of “Setting bolt anchors”. It shows the above steps in fast-forward mode. On the one hand, this will certainly give you a better feel for the correct way to work, and on the other, you can see how simple the actual installation is.
The Fixe PLX expansion bolt and the Fixe PLX bolt hanger are of course available from us.
expansion bolt set – Sources of error
The actual installation of a bolt is relatively simple. However, there are many sources of error when it comes to installing bolt anchors due to the use of carabiners.
We would therefore like to inform you about the most common mistakes below.
cross-loading on the side of the bolt
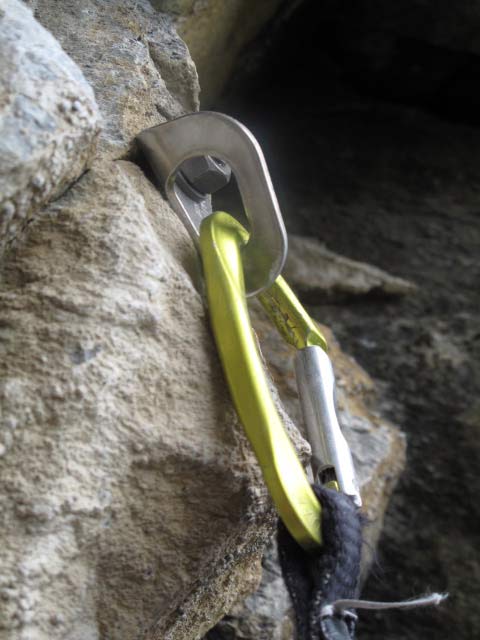
A common mistake when it comes to setting bolts is on the side of the bolt cross-loading of quickdraws. This means that the carabiner on the side of the bolt is positioned somewhere unfavorably and is cross-loaded.
Therefore. Firstly, always hold the Express at the position of the planned fixed point. Secondly, move the Express back and forth a little. Thirdly, check whether there is a cross-loading or possible opening of the snapper.
cross-loading on the side of the rope
The same principle also applies to the carabiner on the side of the rope of a quickdraw. We advise you to use both a short and a long quickdraw for testing. This ensures that there are no problems regardless of the quickdraw length.
Note the tear-out cone when setting expansion bolt
Unfortunately, many developers are unaware of this principle. In simple terms, it means that a expansion bolt has a high explosive force. Therefore, there should be no crag, no crack and no other bolt at a distance of 1.5 times the setting depth around an expansion bolt.
You can find all the details about the principle in our article: “What do expansion bolt hold? “
Galvanic corrosion
Never mix zinc plated steel and stainless steel components, as this creates galvanic corrosion. In simple terms: rust!
This chemical phenomenon is one of the biggest problems when setting expansion bolt and is unfortunately widespread. Please take your responsibility as a developer seriously and take care to avoid it.
All detailed information in the article“Galvanic corrosion at expansion bolt“.
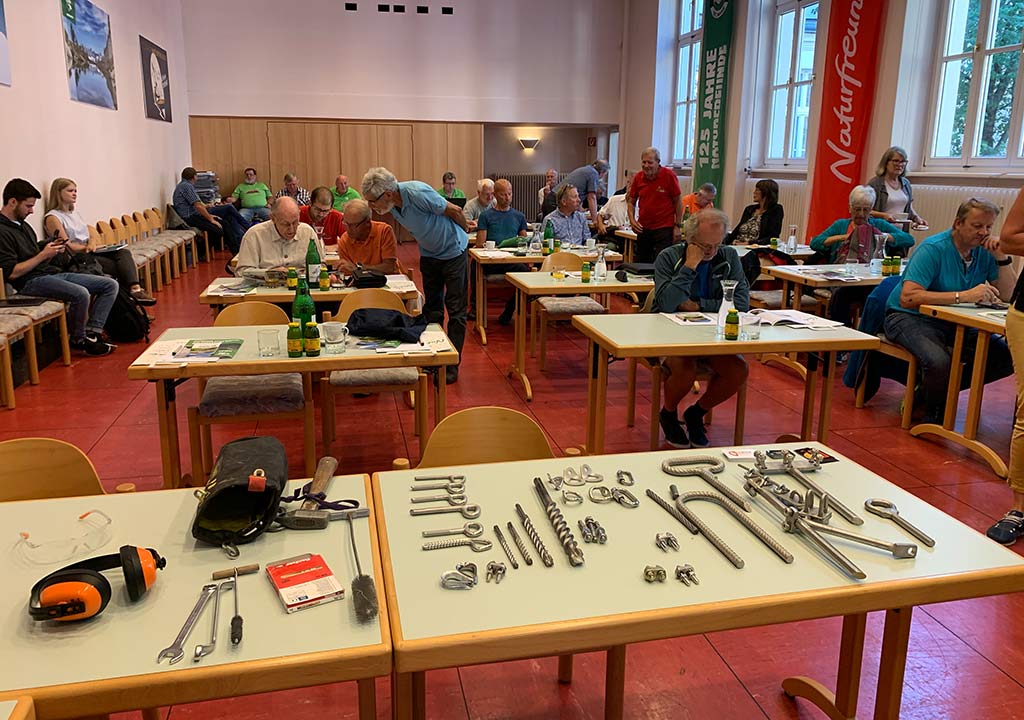
bolting.eu Academy
If you would like to learn more about the topic, then our bolting.eu Academy might be something for you.
Firstly, we offer specialist presentations on many interesting topics. For example, on one of the main problems in the climbing sector, galvanic corrosion at expansion bolt. Our presentations are ideal for conferences, festivals or annual meetings of alpine associations.
Secondly, we offer workshops on key topics. E.g. anchoring in route protection. These approx. 2-hour workshops are perfect for training or further education. For example, the topic of setting bolt anchors is also covered here!
Thirdly, we also offer courses lasting several days. In our bolt a climbing routes courses, you learn how to establish a climbing route with expansion bolt or glue in bolt. The courses are available from 2 1/2 days and take place either in the Malta Valley or in your home region.
We are also planning drilling courses in Greece (Kalymnos and Leonidio).
Link tips: expansion bolt Set
- Interview with Reinhold Scherer from Bergundsteigen 3 / 2001
- UIAA safety standards