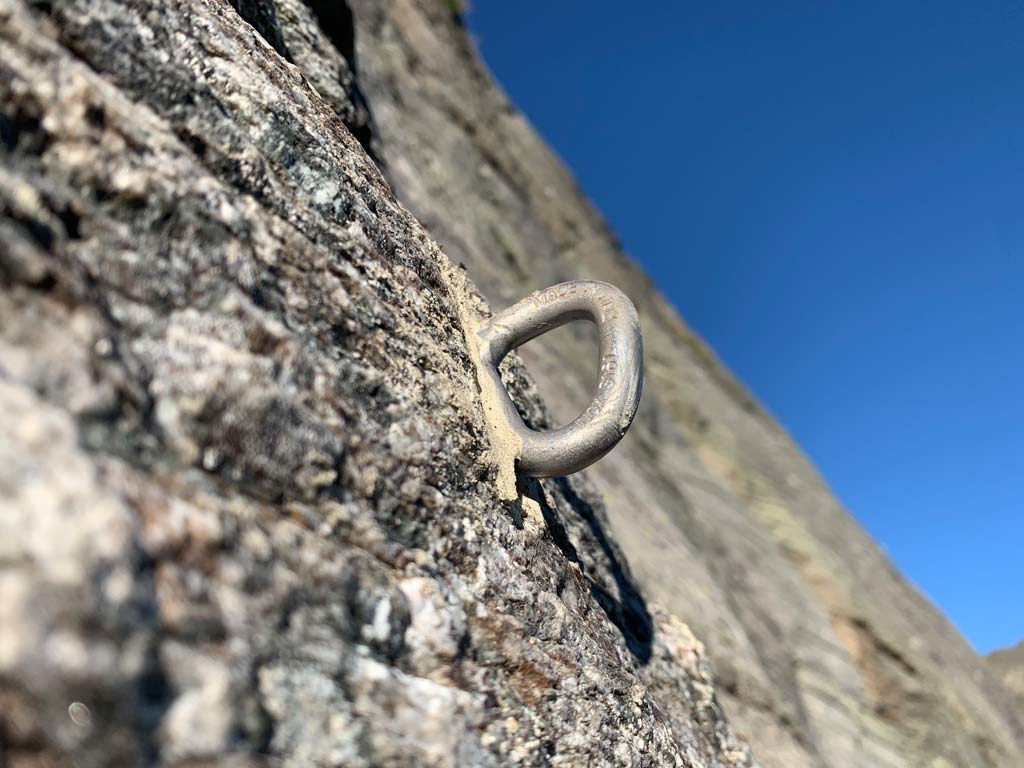
glue in bolt set
glue in bolt set
bolting.eu is THE expert for bolting. That’s why there are instructions below for you on how to glue in bolt set. They are often referred to as “Bühler hooks”. This is why they are sometimes also referred to as “Bühler hooks”.
The installation of a glue in bolt is relatively complex. On the one hand, you have to carry out many steps. And secondly, you have to work extremely carefully to avoid making any mistakes. In any case, installing a Bühler is much more error-prone than installing a expansion bolt.
If you like this article, you should also read the following instructions and important articles:
- to bolt a climbing route
- Fixed PLX – Duplex steel
- Set up a climbing route with expansion bolt
- Set up a climbing route with glue in bolt
- and many more.
Correct steel quality
In the Alpine region, the standard for steel at glue in bolt is A4 steel quality. It is also known as AISI 316 (L).
This steel quality offers the necessary corrosion protection to last an extremely long time in these widths. In other words, we are talking about a service life of around 30 years with proper processing.
The installation of A2 or AISI 304 (L) Bühler hooks is ok. However, products made of this steel are almost impossible to find. This is because the surcharge on A4 steel is only marginal.
The installation of duplex steel or HCR steel is not necessary in the Alpine region. These are intended for bolting near the sea.
Are you interested in this topic? Then read our technical article“Steel qualities for drilling and glue in bolt“.

Borehole cleaning – THE key point
When setting glue in bolt, thorough cleaning of the drilling hole is the key. This is because the injection mortar connects to the inside of the drilling hole. Hence the term “composite hook” by the way.
This means that the mortar actually “sticks” to the borehole wall.
While on the other side it only “encloses” the glue in bolt. This means that the mortar does not “stick” to the hook, but creates a positive on the negative.
This is also known as the “form fit”. It is therefore always extremely important to achieve this form fit in its entirety.
Even more important, however, is the aforementioned borehole cleaning.
This requires repeated cleaning of the hole with a hole brush and blow out pumb is necessary. No drilling dust must prevent the “bond” of adhesive and rock.
The hole must be cleaned particularly thoroughly, especially with slabs. This is because gravity causes even more drilling dust to fall to the bottom of the hole than with horizontal drilling!
Another important point is cleaning the glue in bolt itself. Of course, they should also be completely dust-free!
Positive locking – sources of danger when setting glue in bolt!
The formation of an optimum form fit can be dangerously impaired by other conditions and processing errors:
Firstly, cavities. Adhesive can “seep in” here, sometimes unnoticed. The result. The form fit is no longer optimal. You can counteract this by always checking whether the mortar is seeping out.
If the typical swelling of the mortar is missing, the alarm bells should ring. In other words, remove the hook, quickly refill with mortar and reinsert the hook!
Secondly, the hook itself can cause problems. Firstly, if it is old and does not yet have the 70mm length required for the EN standard. And secondly, if it has no grooves on the shank. Such as old “home made” hooks (an example is the so-called “Sigi glue in bolt”) or if it is a faulty production. In 10 years, we have discovered two of our composite hooks without any fluting!

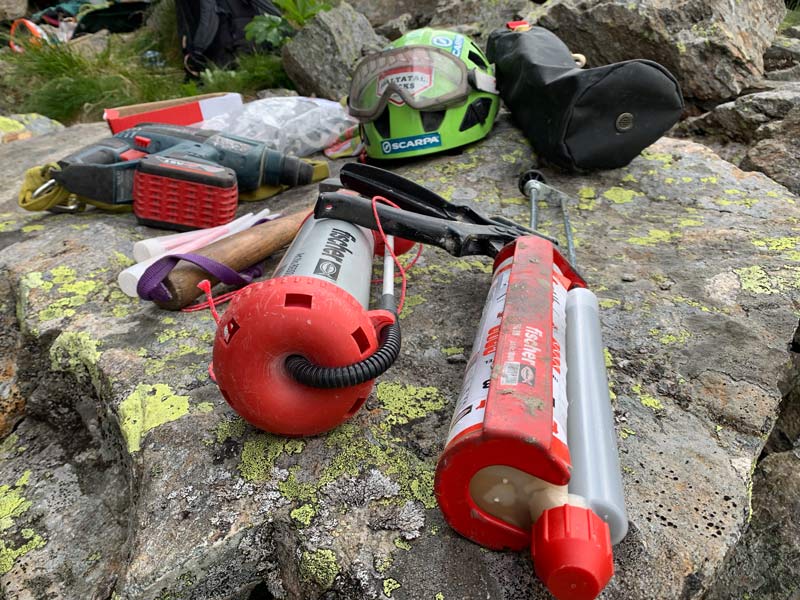
glue in bolt set with injection mortar
For gluing, we clearly recommend injection mortar and squeeze guns. This system has several advantages over glass mortar cartridges.
Firstly, the amount of mortar can always be freely selected. This means that if you have drilled a little deeper or the channel for the eyelet has become deeper, no problem. Because then you just press out a little more.
Secondly, the mixing ratio of the adhesive components always fits. Consequently, you only need to turn the hook slightly.
Thirdly, you can also use it to glue in stands. This is not possible with glass mortar cartridges!
The first disadvantage of this system is that the static mixer quickly becomes clogged. We therefore recommend Prepare all holes perfectly. Then quickly set one bolt after the other when rappelling.
You can also do two things in summer. On the one hand, work in the morning when the rock is still a little colder. On the other hand, keep your cartridges with cooling batteries in the ideal temperature range.
Nevertheless, we recommend that you always order or take enough static mixer with you!
The second disadvantage. You should always throw away the “pre-run”. This refers to the first 5-10 cm of adhesive that comes out of the static mixer. Oily substances often float along with it, so the chambers are never filled evenly and the mixing ratio is not right. Therefore. Squeeze out some glue and only then use it
glue in bolt set with glass mortar cartridges
This variant for setting bolts is only useful for individual fixed points. For example, for refurbishing individual pitons on alpine routes.
We strongly advise against this system if entire routes are to be glued with it. For the following reasons.
Adhesive volume
Firstly, glass mortar cartridges only ever have a certain amount of adhesive volume. This means that if you only drill a little, you may have too little adhesive. However, it can also have to do with small cavities, for example. Same result.
In this case, there is often not enough mortar to be able to spread it around the hook.
Mixing ratio and coarse quartz sand
Secondly, the glue in bolt needs to be vigorously beaten and turned at least 20 times. This is the only way to achieve the optimum mixing ratio of the components. Easy to say in theory. But in practice, setting the glue in bolt is not that easy. This is because the coarse quartz sand makes it very difficult if the drill diameter is too small.
If you use glass mortar cartridges, you must add at least +2 mm on each side. Otherwise it will be tight in the truest sense of the word!
Consequently, the following also applies. You tend to have to use larger glass mortar cartridges in order to have enough adhesive volume!
Big hammer – big stress
Our practical tip is. Use a larger and heavier hammer. Because to get the glue in bolt into the drilling hole, you need to have plenty of “punch” behind it.
But this also means a lot of stress for the component glue in bolt. Of course, hitting the steel hard leads to considerable deformation. This opens the door to stress corrosion. Another reason why we do not recommend glass mortar cartridges for setting Bühler hooks!
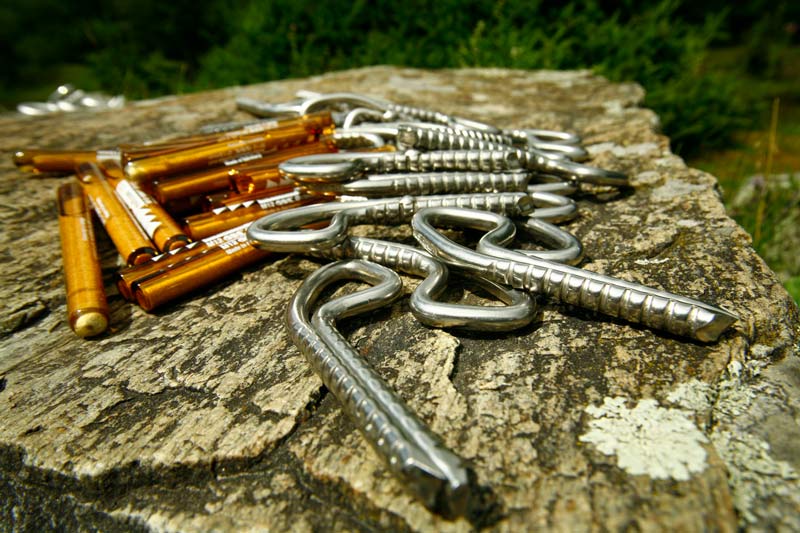
glue in bolt Types
On the one hand, we sell hooks with a “round” shank. And on the other hand those with an “oval” shank.
These two forms both have their advantages and disadvantages.
Round shaft
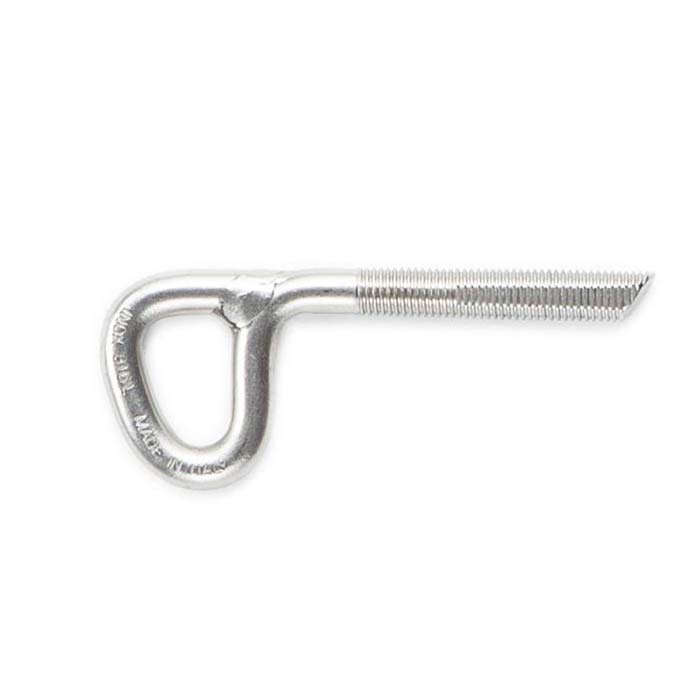
Firstly, a round shaft means a uniform shape. This means that the shaft is surrounded by the same amount of injection mortar everywhere.
Secondly, this means a smaller drilling diameter. An 8mm glue in bolt of this type only needs a 10mm hole. Consequently, +1mm on each side is sufficient.
Thirdly, this means less adhesive and battery consumption.
In short. glue in bolt with a round shaft are much more economical. They can be processed more quickly and also require less adhesive. With a 360ml cartridge you can process approx. 25 pieces of 8mm glue in bolt!
The disadvantages of round shafts are:
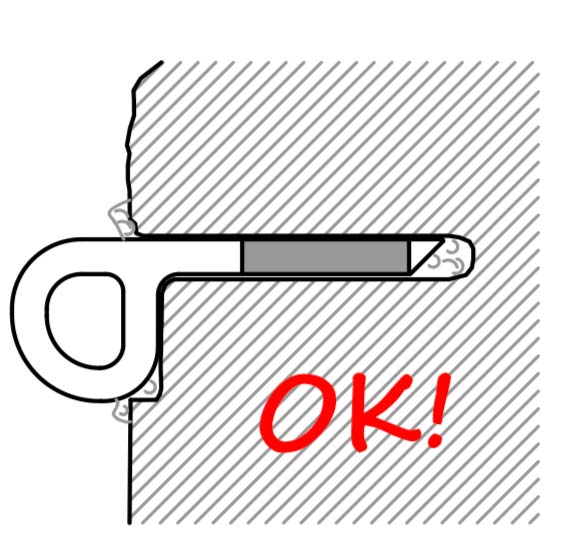
On the one hand, you must not forget the channel on the side of the rock for the hook eye. Otherwise the entire radial load will be placed on the round shank. Over time, this can lead to the hook breaking.
Secondly, there is the weld seam. This will not be a problem in our latitudes. But you need to know the basics. Weld seams can lead to problems if they are not done properly. And in the case of heavy chemical loads, such as seawater with a lot of sodium chloride, it is a potential point of attack for corrosion.
Objectively speaking, these hooks are quicker to process and a cheaper option.
Oval shaft
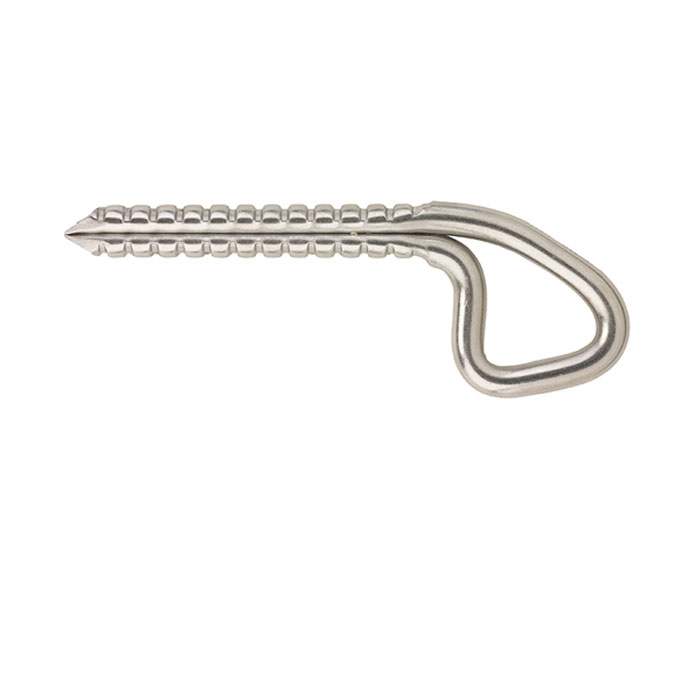
A glue in bolt with an oval shaft has the following advantages.
Peter Manhartsberger is an extremely valued developer colleague. He is also a product developer and quality manager at Austrialpin and therefore “in the know”.
Peter says, for example, about the glue in bolt from Austrialpin with an oval shaft:
“With the way our glue in bolt is designed, no load-bearing weld seam is necessary.
Both parts of the shaft are only held together with a spot weld to prevent it from gaping open. If the welding point is poor, this would have no effect on the strength.
Possible effects may only become visible and/or noticeable later in the product’s life. That’s one reason why we don’t want to have a weld seam at this point.”
In simple terms, this means that If a steel rod is processed into a hook with an oval shank, there is no load-bearing weld seam. Consequently, a potential weak point (the weld seam) is eliminated.
The oval shank also explains why this type of hook is not so sensitive to setting errors. For example, the omission of the channel for the eyelet on the side of the rock. This is because the hook has more surface area and an oval cross-section. This means that the hook is less sensitive to radial “twists”.
However, these advantages also come with a few disadvantages.
Firstly, you have to drill wider holes. As a rule, the required drilling hole diameter is 14 mm. Consequently, this means significantly slower work progress.
Secondly, you also need more battery power.
And thirdly, much more glue. A 360 ml cartridge is enough for about 15 glue in bolt with a length of about 80 mm.
From an objective point of view, these hooks are therefore the highest quality solution, but require more effort to drill and cost more to purchase.
glue in bolt set – procedure
Time needed: 10 minutes
glue in bolt set with injection mortar
- Check the bedrock
Hit the rock with the rock hammer exactly where the glue in bolt should go. Hollow areas are immediately recognizable or audible due to the “dull” sound.
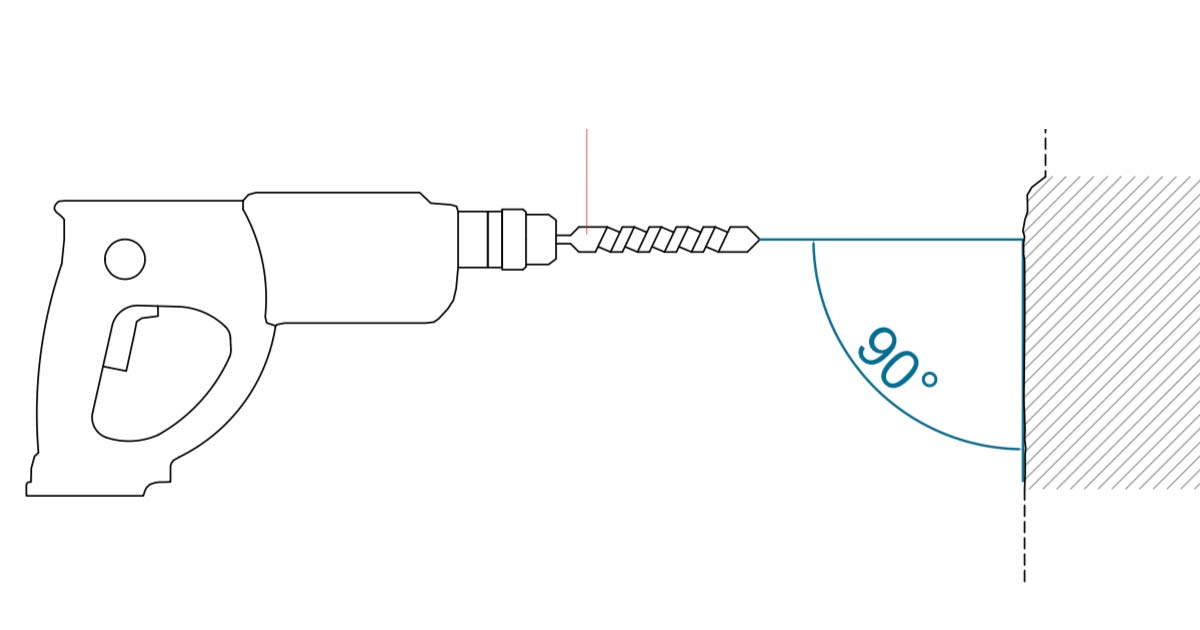
Only place glue in bolt in fixed areas! - drilling hole drill
For a glue in bolt with a round shank, the drilling hole must be +2mm wider than the shank diameter. Always drill deep enough. Include the channel for the carabiner eyelet on the side of the rock!
- channel for the eyelet drill
Drill the channel for the carabiner eyelet on the side of the rock. This protects the glue in bolt much better against radial forces.
Note. There are glue in bolt where the shaft is centered. Two small channels must be drilled here!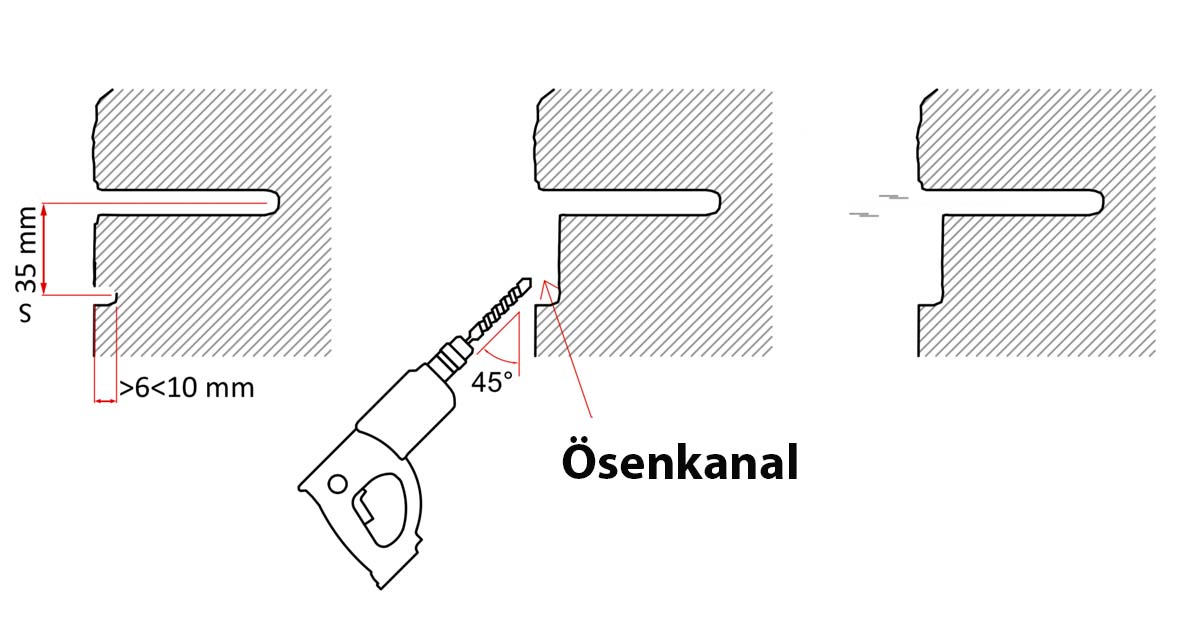
- drilling hole and clean channel for the eyelet
Clean the drilling hole and the channels with a blow out pumb and a perforated brush. At least two cleaning passes must be carried out.
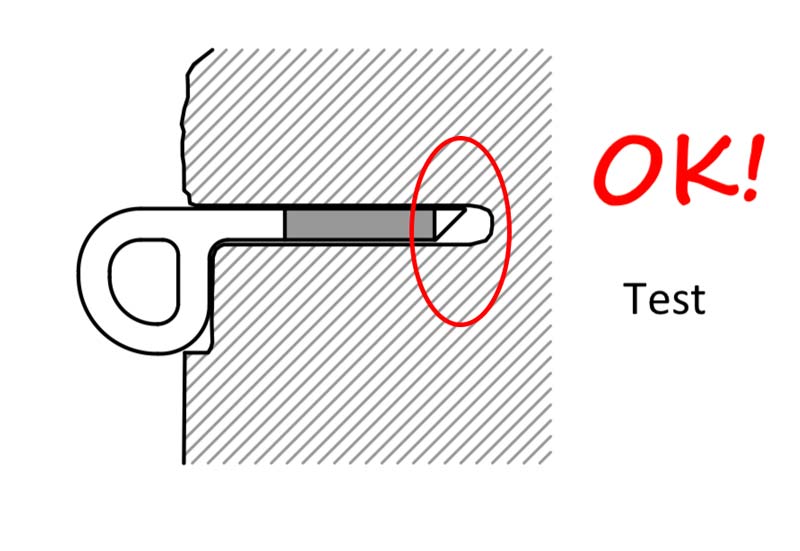
- Hook test
Now insert the glue in bolt into the drilling hole to test the drilling hole or channel for the eyelet. Can the glue in bolt be fully inserted? Is the eyelet well countersunk on the side of the rock?
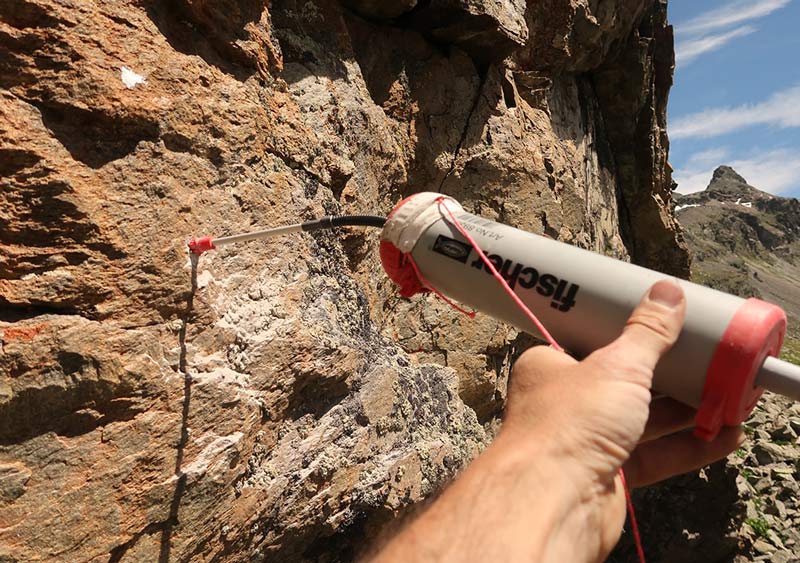
- injection mortar Fill in
Now fill the drilling hole completely with the injection mortar.
We clearly recommend using cartridge mortar and a dispensing gun when systematically setting glue in bolt.
Glass mortar cartridges are only useful to a limited extent, e.g. for individual securing points.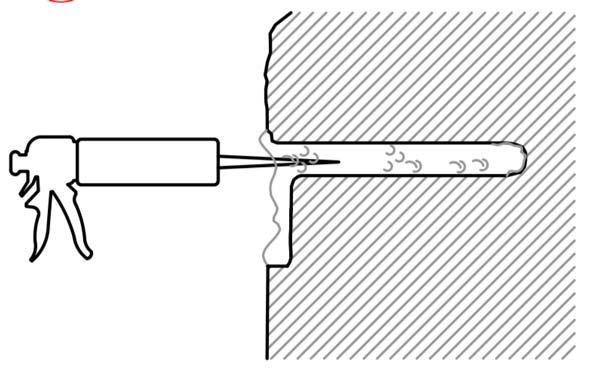
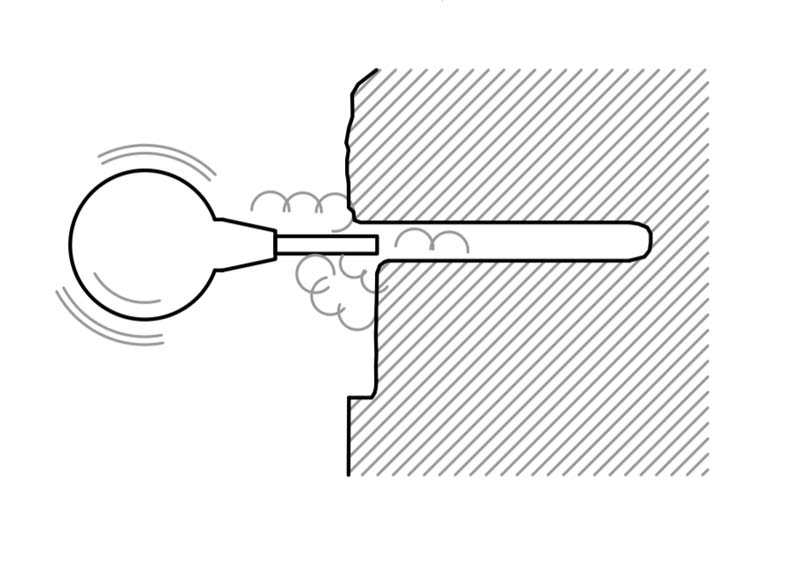
- glue in bolt screw in
Carefully insert the glue in bolt into the drilling hole. Then start to push it into the drilling hole while constantly turning it.
Watch out for glue spraying out and therefore always wear glasses.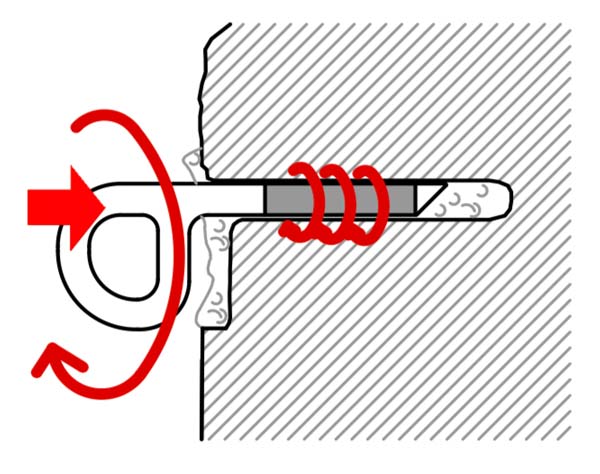
- Spread the mortar
Spread the oozing injection mortar cleanly. No water should get into the drilling hole. In addition, the eyelet on the side of the rock should be cleanly glued in the corresponding channel.
- Allow to harden & test
Give the injection mortar enough time to harden. This usually takes between 1/2 and 1 hour. The glue in bolt is best tested with a small crowbar. Simply lever it with normal force. The hook should not make any movement!
glue in bolt set – installation instructions
Our supplier Raumer has created a very clear installation guide for setting Bühler hooks. You can download them right now.
glue in bolt set – Video
Below we show you a suitable video. This will give you an even better feel for how to set the hooks. Because a picture is worth a thousand words.
Working with injection mortar is not easy. But if you work cleanly and with concentration, you should be able to do it wonderfully!
glue in bolt set – Sources of error
Drilling depth too shallow
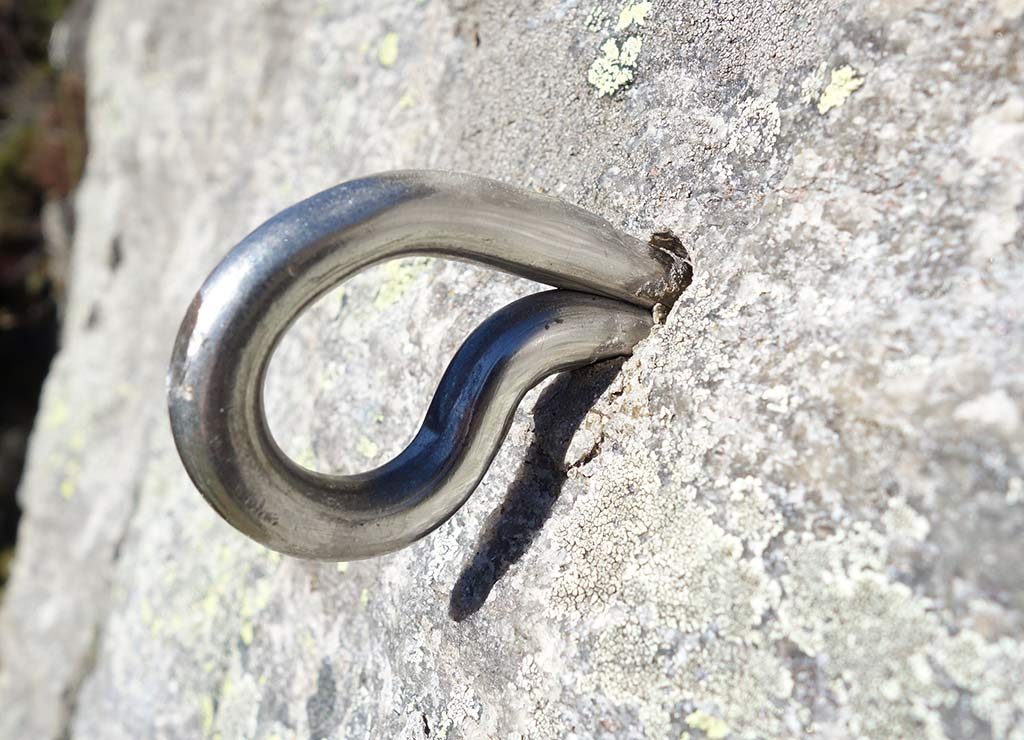
If the drilling depth is too shallow, the glue in bolt will protrude from the rock. Consequently, the carabiner eyelet does not touch the rock at all. Unfortunately, this is a typical rookie mistake that can be avoided with a simple insertion test before gluing.
drilling hole not completely cleaned out
Especially with slabs or in horizontal sections, a lot of drilling dust falls into the drilling hole. If the drilling dust is not blown out properly, the hole may not be deep enough!
Therefore. When setting glue in bolt in shallow passages, blow out the hole particularly well!
Use of glass mortar cartridge in case of excessive heat
Glass mortar cartridges should only be used for individual fixed points. Unfortunately, you often see glue in bolt protruding from the rock and processed with the cartridges.
If the rock is very hot, the adhesive of the cartridges can become so hard within a very short time that the hook can no longer be inserted. We are talking about just 1-2 minutes!
Therefore. Firstly, work in the morning when the rock is cool. Secondly, cool down the glass mortar cartridges with cooling batteries.
Use of glass mortar cartridge if too large glue in bolt
glue in bolt from approx. 90mm length or 12mm diameter should not be processed at all with glass mortar cartridges.
Firstly, you then often need two adhesive sleeves. As a result, the glue in bolt is even harder to get into the drilling hole than it already is.
Secondly, the impact resistance also increases significantly due to longer lengths. Hammering and turning at the same time is becoming increasingly difficult.
In short. Only use glass mortar cartridges to set small or short stirrup hooks. Set large and long glue in bolt only with cartridges or a caulking gun!
None channel for the eyelet
Without channel for the eyelet glue in bolt also hold. But the installation does not correspond in any way to the manufacturer’s instructions (see download above!).
This means that it becomes a problem for climbing frame owners in particular. This is because a non-standard installation of glue in bolt poses a major legal risk. This is because the average careful climbing garden owner should work according to the installation instructions.
From a technical point of view, glue in bolt that have not been countersunk or glued into channel for the eyelet are much less resilient. Radial forces in particular put enormous strain on the fixed point. This is because 100% of the force is transferred to the shaft.
Carabiner on the side of the rock with cross-loading
A common mistake when settingglue in bolt is the use of quickdraws on the side of the bolt cross-loading. This means that the carabiner on the side of the bolt is positioned somewhere unfavorably and is loaded crosswise.
Therefore. Firstly, always hold the Express at the position of the planned fixed point. Secondly, move the Express back and forth a little. Thirdly, check whether there is a cross-loading or possible opening of the snapper.

Carabiner on the side of the rope with cross-loading
The same principle also applies to the carabiner on the side of the rope of a quickdraw. We advise you to use both a short and a long quickdraw for testing. This ensures that there are no problems when climbing the route, regardless of the length of the quickdraw after placing the piton.
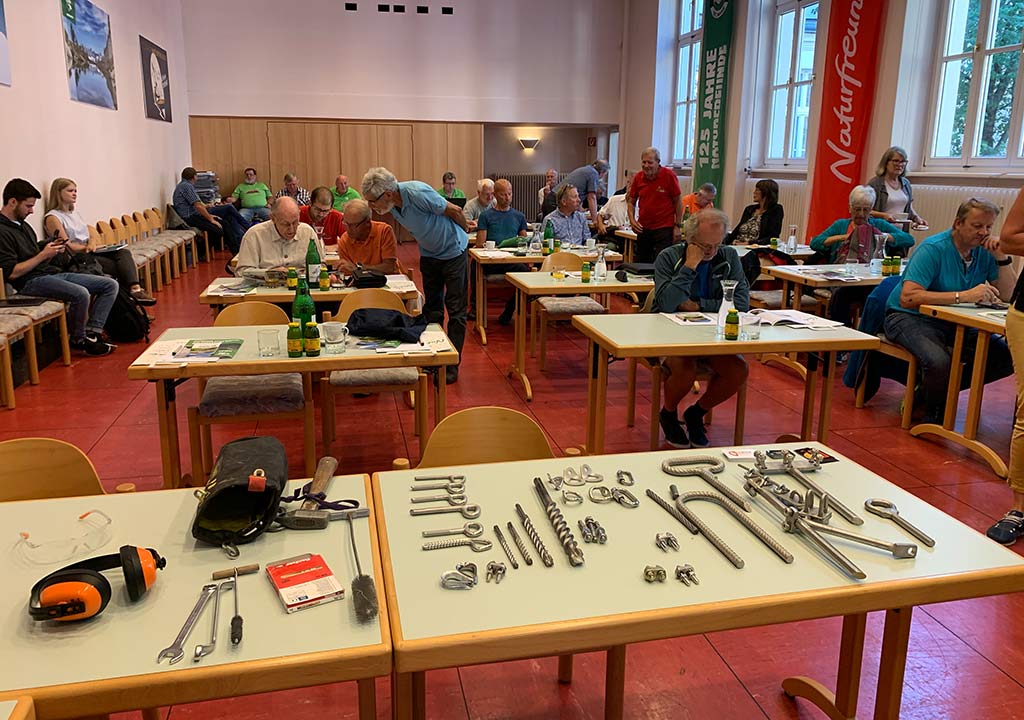
bolting.eu Academy
If you would like to learn more about the topic, then our bolting.eu Academy might be something for you.
Firstly, we offer specialist presentations on many interesting topics. For example, on one of the main problems in the climbing sector, galvanic corrosion at expansion bolt. Our presentations are ideal for conferences, festivals or annual meetings of alpine associations.
Secondly, we offer workshops on key topics. E.g. anchoring in route protection. These approx. 2-hour workshops are perfect for training or further training. For example, the topic of setting glue in bolt is also covered here!
Thirdly, we also offer courses lasting several days. In our bolt a climbing routes courses, you learn how to establish a climbing route with expansion bolt or glue in bolt. The courses are available from 2 1/2 days and take place either in the Malta Valley or in your home region.
We are also planning drilling courses in Greece (Kalymnos and Leonidio).
Link tips: glue in bolt Set
- Interview with Reinhold Scherer from Bergundsteigen 3 / 2001
- UIAA safety standards