Set up abseiling point
From time to time, we at bolting.eu receive questions from customers about setting up abseiling points. Reason enough to pass on some of our know-how to you in the following article.
Firstly, abseiling points are an essential part of an (alpine) route. Secondly, there are some tactical tips on where best to place the abseil points. And thirdly, it makes a big difference how you set up the rappelling points. Only if you do everything right will rappelling through a wall be safe and rope handling pleasant for repeaters.
Set up abseiling point – terrain dictates a lot!
One of the most frequently asked questions by some customers is: How long does the distance between the climbing anchors on an abseil slope have to be?
The answer is relatively simple. Basically, the terrain determines the distance between the abseiling points. Of course, it makes sense to use the lengths of 70m and 80m climbing ropes and 50m and 60m half ropes that are common today.
But what use is this if the terrain is flat and dotted with rock scales? Then a abseil anchor every 25 meters and rappelling with only one rope is much more effective. Because in this case the rope does not get tangled up so easily on blocks or scales.
What if there is a lot of shrubbery under a nice ledge where the ropes can easily get caught? Then you might also prefer to set up short abseiling sections for one rope in this section.
Conversely, sometimes very long rappellings make perfect sense. What if the wall is overhanging and there is only rock contact again after 58m? Then exactly here a climbing anchor makes sense. Of course, you should communicate this fact in your topo.
Stands for the abseiling points
When setting up abseiling points, it is important to remember that they are potential danger spots!
For one thing, you are usually tired on the way down and less alert than on the ascent. And secondly, an abseil is a point at which you have to belay yourself or rappel from the abseil in the first place.
Consequently, every abseil point should be set up technically correctly.
Here are our recommendations:
- Abseil anchors with 1 ring or abseil anchors with 2 rings should be arranged “in series”. This means that the upper anchor point is only slightly offset horizontally, but vertically far above. The chain should always remain untensioned.
- Two bolt hanger with ring(s) or glue in bolt with ring(s) can also be used. In this case, the abseiling points must be positioned at an angle. This ensures that the correct distance between the expansion bolt (tear-out cone!) is maintained. And on the other hand, the abseil anchor is used redundantly. This means that the upper ring carries the load. The lower ring is “only” intended as an unloaded back-up.
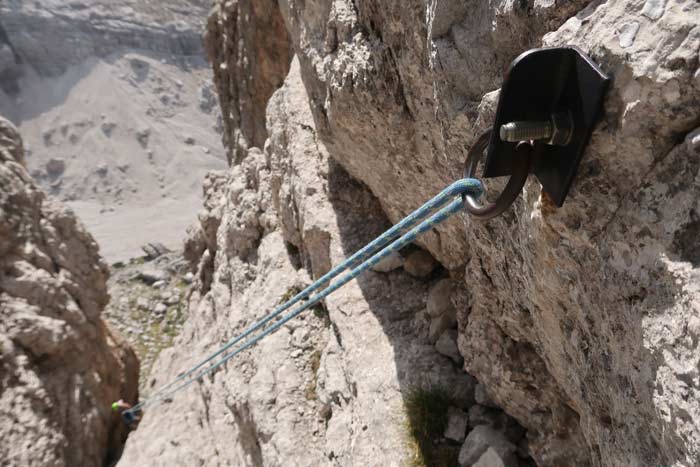
- Sometimes developers “only” place two or three abseil points when setting up an abseil point. expansion bolt or glue in bolt. Then they install a screw link – quick link in the lower anchor point. In this case, this anchor point must be backed up “in series”. If you are already paying for everything out of your own cash, you can do this with a cordalette or old pieces of rope. Simply cut off pieces about 1.2 meters long, thread them through the eyelets and connect them with a double fisherman´s knot.
Again, note the minimum distance between the expansion bolt. This is 3 x the setting depth. glue in bolt can be set closer, as they do not exert any spreading pressure. More on this topic in our article“What do expansion bolt hold?” - If possible, set up the stands on an abseiling slope on ledges or ledges. This gives you the opportunity to stand on your feet. It also allows you to relax briefly and get the blood flowing in your legs again.
- Pay attention to the surrounding terrain when considering potential positions for abseil anchors.
– “behind-foot” sheds where ropes can get stuck
– insidious cracks and crevices where the rope can disappear or get stuck
– vegetation that likes to cling to the fallen ropes
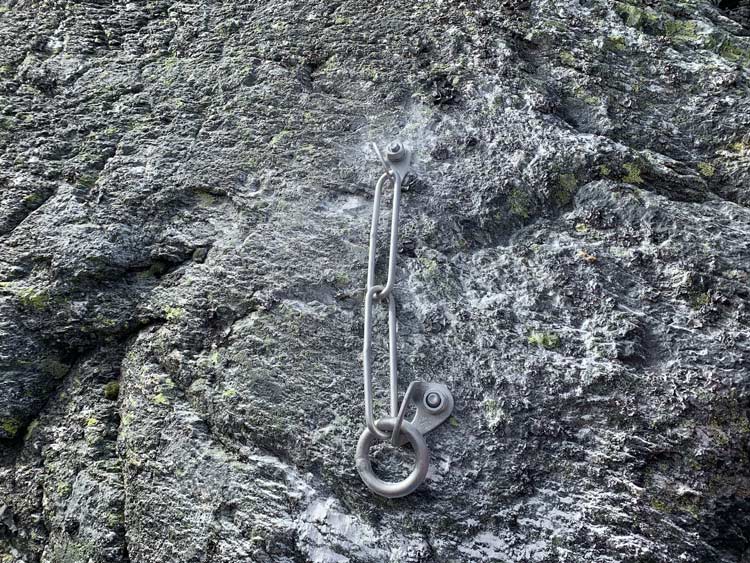
abseil anchor with 1 ring 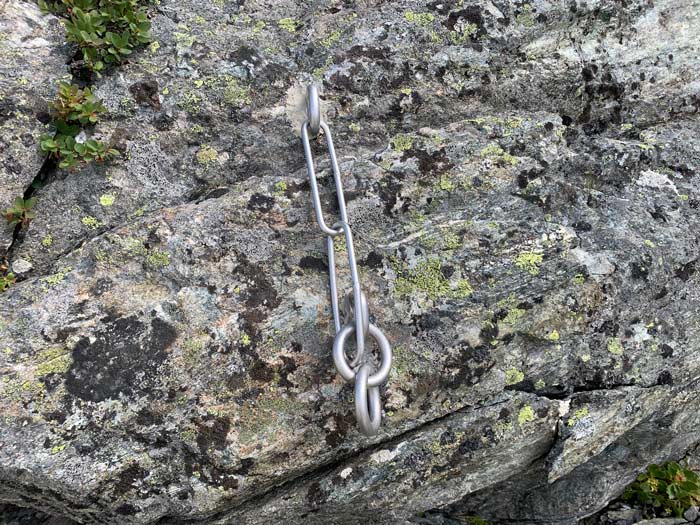
abseil anchor with 2 rings 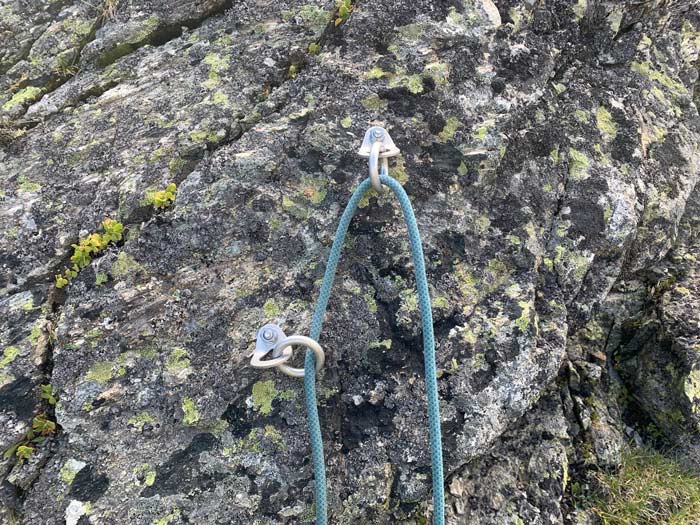
Two individual abseil points, correctly offset.
Ring, ring, ring, why don’t you give me a ring?
This popular ABBA song is also perfect for setting up an abseiling point.
This is because abseil rings with a diameter of 10 mm or an inner diameter of 30 mm or more are ideal for rappelling. They are clearly preferable to quick links. Here are the reasons why.
Firstly, a 10mm ring has a larger radius. Consequently, the rope can be pulled off better here as there is less friction. Secondly, a ring is constantly rotating. This means that it cannot be ground down. And thirdly, a ring mounted in a Rapidgied is at 90° to the rock. This means that the rope is exposed when it is pulled off. It is impossible to “pinch it off” as with a quick link!
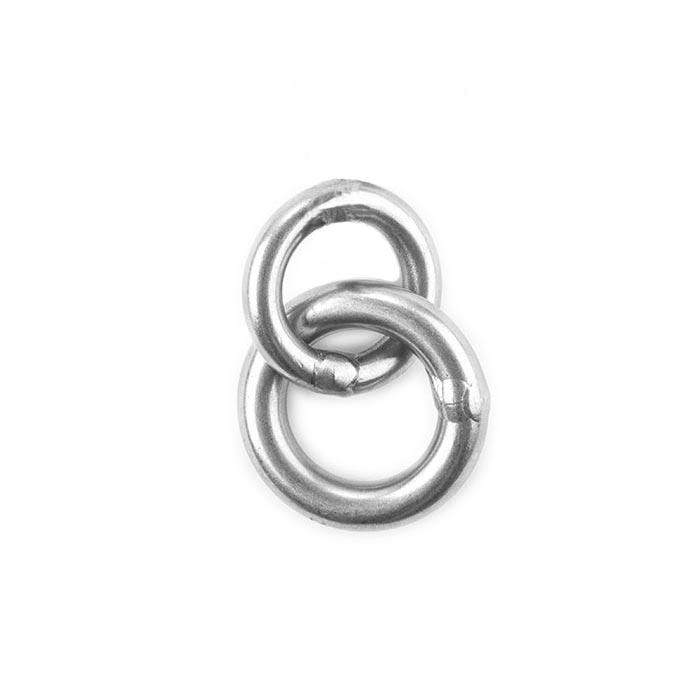
10mm double rings 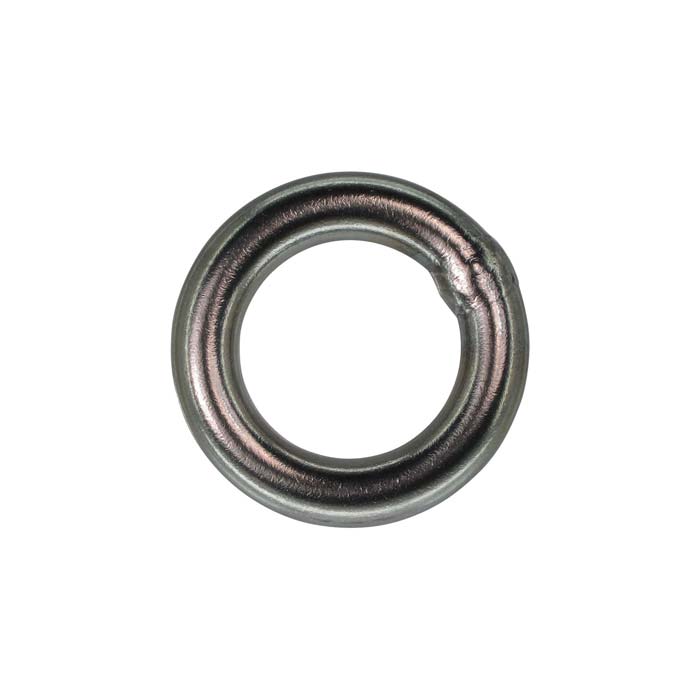
10mm double ring 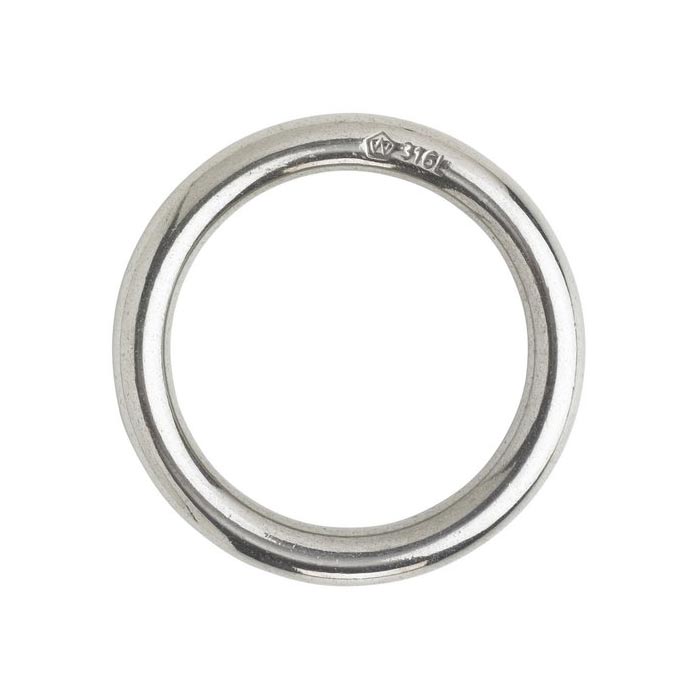
8mm ring without weld seam
Set up abseiling point – caution required when descending!
Large ledges on an abseil route can be both a blessing and a curse. On the one hand, they are great rest points and emergency bivouac spots. On the other hand, they can also be a nightmare when pulling off the rope. Consequently, it is important to set up the abseil point carefully on large ledges.
As a rule: set the abseil anchors on heels as high as possible. On the one hand, it is more comfortable to have the abseil point at chest or eye level. This way you can stand well and the self-belay is nicely tensioned upwards. The overall handling is simply more pleasant this way.
And on the other hand, the rope has a steeper downward angle later on. As a result, the climbing rope is much easier to pull off. A classic mistake when setting up abseiling points is that the abseiling points on ledges are too low. The rope then runs flat against the edge and creates immense rope friction when pulling off.
If the ledges are extremely large, the abseil point should be placed directly towards the edge or even below it. This may well mean that you have to install a short fixed rope. Or other fixed points for self-belaying on the edge of the rock.
Sometimes it also pays to equip the abseiling point with longer steel chains, which can then be placed over the edge. This allows the rope to be pulled off without friction.
When rappelling through a wall, there may also be walking passages on ledges or ledges from one abseil anchor to the next. Cairns, clearly visible colored markings and fixed ropes can be extremely helpful in finding your way.

Classic errors
Unfortunately, “classic mistakes” still happen when setting up abseiling points. In other words, there seem to be certain patterns that are used repeatedly.
Below we present a few of these errors and refer you to our bolting blog posts where you can expand your know-how. We hope to contribute to more safety and better climbing infrastructure for the entire community.
Galvanic corrosion
The installation of zinc plated screw links – quick links on stainless steel fixed points is a widespread phenomenon.
Unfortunately, this leads to galvanic corrosion. Are you not familiar with this?
Then read our technical article“Galvanic corrosion at expansion bolt and glue in bolt“.
To put it simply, you must always use a stainless steelscrew link with stainless steel bolt hanger and glue in bolt.
“European Death Triangle”
When it comes to setting up the abseiling point, a classic mistake is just as common: placing the anchor points horizontally!
This way of attaching fixed points for rappelling is no longer in keeping with the times. Today, these are always connected “in series”.
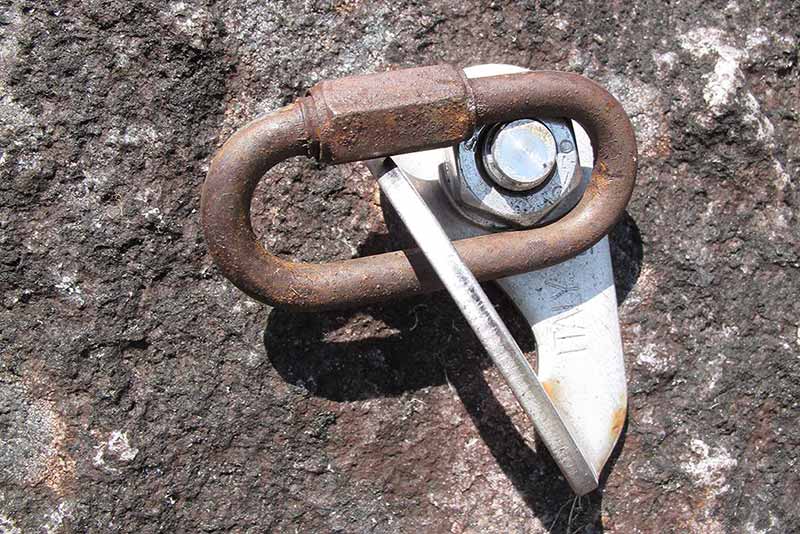
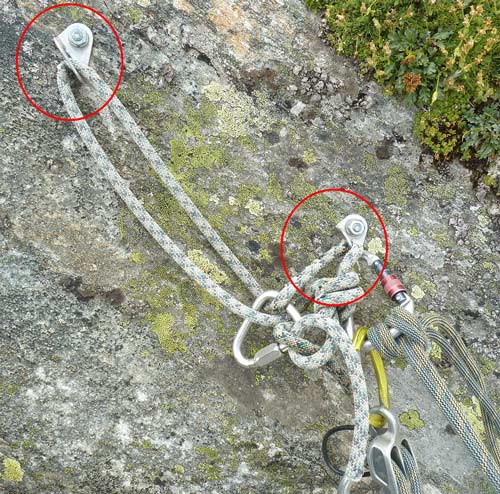
In extreme cases, the “all-round slings” are also very bad. I.e. pieces of rope that are threaded directly through the lugs without an intermediate knot. See attached picture.
It is not for nothing that such a abseil anchor is called the “European death triangle” in the USA. This name speaks for itself. Firstly, this loop unthreads completely if it breaks at any point. Secondly, the abseil ring is located in the rope loop instead of directly in the lower hook.
It’s a shame that this still happens.
Set up abseiling point – DIY store quick links = No GO!
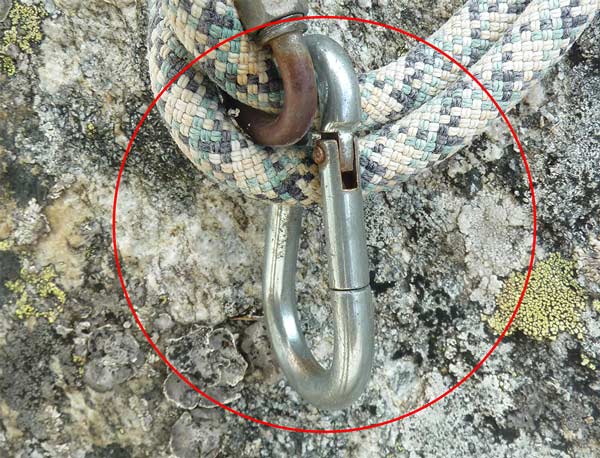
Nobody knows why. But the frequency with which non-standardized DIY market quick links can be found on rappelling equipment is really frightening.
On the one hand, these products do not meet any standards. And secondly, with breaking loads often around 200-400 kg, they are extremely dangerous. On average, the force required for rappelling is around 2.6 to 4.6 kN, depending on how dynamically the rappelling has to be done.
Two individual abseiling points incorrectly positioned
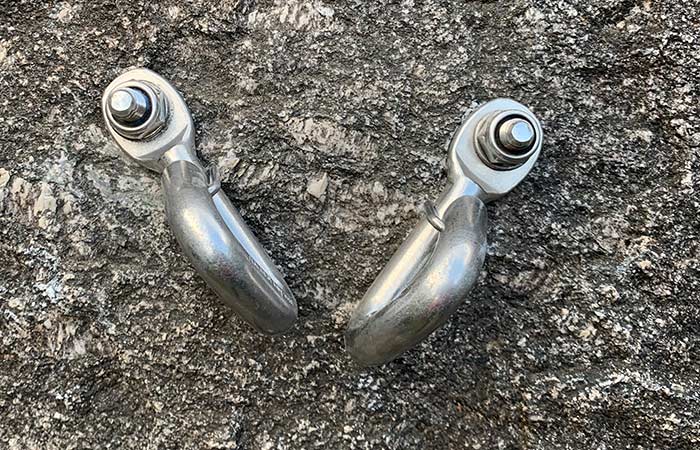
Another “classic” when it comes to setting up an abseiling point is disregarding the principle of the breakaway cone.
The following picture clearly shows this error. The expansion bolt of these abseiling points are 9cm long, so they should be 27cm apart.
In addition, they are not staggered on top of each other.
Link tip: bergundsteigen article on abseiling accidents with old slings
